In the short time that we've had our eCraft machines we've been able to cover a LOT of topics. All of these articles, up to now, have been limited to things we can do through the console of the machine.
In one more day, we will be able to turn our attention to the eCraftShop Pro software. But, I don't want to go there without covering one more very important console topic. And, that is the subject of DELETING a shape.
Most of the actions that we do from the console are pretty straightforward and relatively intuitive. But, if there is a function that defies all logic, it is that of deleting an unwanted shape from the cutting queue. It sounds simple enough, "Set Multicut to Zero." Yep! That'll do it alright! IF you can find out how to make it go to zero!!!
Here is a video that demonstrates this er... unique... and uh... original process.
Easy, eh?
But, you have to ask yourself this question, "Why can't I select a multicut of zero ANY TIME?"
Beats me? But, hey... like I said... we didn't design it, we just have to find a way to use it. And, we did. And, it works. Isn't that what really counts?
Now... on to a new month with our eCrafts and on to the software!
Tuesday, August 31, 2010
American Crafts Gold Glitter - Blade Cover Effects
A potential eCraft buyer and her dealer had tried American Crafts Glitter paper with no success. As luck would have it, I happened to have a sheet to test.
As I pulled out the sheet it was immediately apparent that at some point I'd tried to cut the infamous 3" tree in it and had not been able to cut clear through the material. But, it was probably when I had taken the machine up to my granddaughters and I KNEW we had gotten glitter to cut. So, this find was puzzling.
Then it dawned on me. The actual pressure of the blade seems to be dependent on whether or not the blade cover is on. I've cut enough now to bet that I'd first tried cutting the paper with the blade cover on. So, this time I would run a little test.
I would first try a cut with the blade cover in place and see what happened. If it failed to cut this heavy paper in one pass with the blade cover on, I would attempt a new cut after taking the blade cover off.
Here is the result:
As you can see, the blade cover DOES seem to affect the ACTUAL PRESSURE of the blade on the material. That's puzzling, I know, since the cover had a hole in it that should have no effect on the blade. But, for some reason it does.
So, if you are having problems getting a cut at the highest Pressure Level (8) then try again with the blade cover removed.
Here are two hearts cut with the blade cap off. Pressure 8, Multicut 1, Size 3, No tabs.

Click for larger images
As you can see, these are nice clean cuts. But, the person that alerted me to the issue of not being able to cut the AC Glitter also sent me some photos that demonstrated very clearly that they did have real problems with the blade cover on even with multicut set to high numbers. There is always the possibility that the differences we see have to do with different machines. But, I didn't even try to test how many passes it would take to cut this with the blade cap on. I suspect mine would have looked exactly like hers had I not immediately removed the blade cap. Perhaps she can test it without the cap and let us know how the machine she was testing performs.
Monday, August 30, 2010
SVGCUTS.COM - The premiere source for SVG Files.
Note: Every now an then, I'd like to highlight some of the people that might be important to your success and fun with your digital die cutting machine. This is the first, of this genre. I hope you not only find it helpful; but, you find it helpful for a long time to come.
This is the story of a very special web site and two very special people that make it happen. For eCraft owners, I think SVGCuts.com is going to be an important source of information and SVG images to use with eCraftShop Pro.
Not all of us would see a stressful job with squabbling officemates or losing a great job at a major corporation as opportunities. But, that is exactly how SVGCUTS.COM was born.
In early 2008, Mary (the main artist for SVGCuts) was working as a project manager for a software company in Schaumburg, IL and she was getting fed up with her job. She found her job to be super stressful and all of the office squabbling was wearing her down. She ALWAYS wanted to have a store where she sold cute things, she just wasn't sure what or how!
At that time, Leo (the technical director at SVGCuts) was working as a network administrator for Chrysler's corporate office in Chicago. Counting on the stability of his position, Leo and Mary agreed she should quit her job and follow her dream. The first step toward that dream was to spend the next 8+ months learning Adobe Illustrator and testing out different creative ideas to see if she could generate income on Etsy and by creating stock illustrations for her istock.com portfolio.
At that time, Leo (the technical director at SVGCuts) was working as a network administrator for Chrysler's corporate office in Chicago. Counting on the stability of his position, Leo and Mary agreed she should quit her job and follow her dream. The first step toward that dream was to spend the next 8+ months learning Adobe Illustrator and testing out different creative ideas to see if she could generate income on Etsy and by creating stock illustrations for her istock.com portfolio.
In September of 2008, Leo was laid off due to the financial crises at Chrysler. Rather than panic, Leo turned his attention to doing what he really had wanted to do, shoot stock photography and market it through istock.com. At the same time he began to seriously study internet marketing. But, they still didn't have the direction they needed for them to truly thrive on the internet.
That's where Leo's mom came into the picture by giving Mary a Cricut for Christmas. Soon after, they found “Sure Cuts A Lot”, which allowed Mary to create and cut her own shapes with her Cricut and sell her own line of cards and scrapbook pages on Etsy. Mary was hooked!.
Mary spent about a month coming up with cute cards featuring her custom made die cut designs to sell on Etsy. People responded well to her products and one night she had an epiphany and thought "Duh, why don't I just sell my digital designs to people that have SVG compatible cutting machines!"
They realized that they had something here, but if this was going to work, they'd have to streamline the process so that she could spend time creating and not answering emails and sending files all day long. So, SVGCuts was born.
Both Mary and Leo are perfectionists and I've witnessed the fact that they just keep getting better and better at what they offer and what they do. In just under 18 months, SVGCuts has received over 10 million pageviews from crafters in more then 150 different countries! Mary's designs are marvelous and I love talking photography with Leo on their forums. In fact, it was the generous photographic help on their forums that first caught my eye. I could tell he not only knew his stuff with a camera; but, that he was very generous in sharing what he knew.
They continue to grow, adding their first design team member, Thienly Azim and Mary is filtering through hundreds of portfolios in search of new artists for their store! I REALLY like what I see at SVGCuts.com from top to bottom.
Check them out. Http://www.svgcuts.com And, be sure to check out their forums. I hope to test some of Mary's SVG designs on the eCraft as soon as the software is ready. And, I KNOW that I'm going to be linking to their site a LOT as we began using both Inkscape and eCraftShop Pro with our eCrafts.
Great people! Great site!
White Linen Weave - Medium Light Weight
This paper is made in Germany for The Paper Company. It's a luxurious linen finish with a pearl like quality. It can be purchased through Joanne's. it's called White Linen Weave.
The Settings:
Method = Thin paper over a card stock stabilizer
Tab Density = 1
Tab Width = 1
Pressure = 6
Single Cut
I first tried this paper alone, without a stabilizer and it failed to cut properly. I then mated it to a card stock stabilizer with a pressure setting of 2. It cut clean; but, failed to cut clear through. A pressure setting of 4 was better. But, still was not cut through in all areas of the shape. A pressure setting of 6 did the trick and the cut was beautiful.

BUT... there are those tabs... So.... I wonder... could it? Would it? We just GOTTA go for it!
TAB DENSITY = 0 No tabs!!!

Whoaa!!! This is GREAT. Click on that image to see the wonderful texture of the paper and the equally wonderful nature of the cut. We're starting to get the hang of using this eCraft!
Either I am easily amused or this is REALLY FUN! (Hmmmm... probably BOTH!)
Holographic Paper - Self Stick
It's too bad that I can't duplicate the true nature of this Holographic Paper available at Joanne's. It's Darice's Self Stick holographic paper and need I say that it is very shiny!
First the settings:
Method = No Extra Stabilizer
Tab Density = 1
Tab Width = 1
Pressure = 4
Size = 3

A pressure setting of 2 cut most of the shape cleanly. But, a pressure setting of 4 was perfectly clean. And, the tabs were no problem at all. It's true Holographic image and I KNOW that my granddaughters are going to find something cool to cut with this great paper. By the way, the back peels away very nicely without damaging the shape at all.
All the metallic papers I've tried so far work. But, this one is REALLY clean.
Ultra-Ultra-Ultra Thin Papers!
This image might not impress you at all. If not, I will understand. But, it was amazing to me because I'd held this tissue thin paper in my hand before I tried to cut it. It flopped around like a Kleenex. First, the settings and the method.
Method - Thin paper over card stock
Tab Density = 1
Tab Width = 1
Pressure = 2
Size = 3

"Tom", you say, "That's TERRIBLE!" And, rightly so. But, wait, we're not finished yet. Did I tell you that this paper is as thin as Kleenex? I did? Good. Did I tell you it was like Kleenex with splinters? No? Well, it is. It's a magnificently difficult paper. And, the eCraft was able to cut it, first try, this far.
So, what happened? The thin paper moved. Not to worry. We'll just tape the bottom of the tissue to the bottom of the card stock and try again.

That was the ticket. Now, I am REALLY impressed. You see, I had a Pressure setting of 2 and that was perfect for the paper itself. But, it was a little low for the twigs or string or whatever is embedded in that paper. Because I had Tabs set to 1, it was natural that I yanked out some fibers at the tab points. So, if I had another sheet of this paper, I'd try it with NO tabs and a pressure setting of 3.
But, what of a less challenging shape with the same tabs and pressure settings. How'd it do?

I am, once again, going to say that I am super impressed that the eCraft could cut this wispy thin tissue-like paper. If the lightness of the paper wasn't enough of a challenge, the fibers IN the paper just added to the challenge.
The paper was from Joanne's and it's manufactured by The Paper Company. Mulberry White 10001-040.
I call this one an impressive success. But, don't forget to tack the thin paper to the card stock at the bottom with a little piece of tape.
More on cutting cloth
Silly me. Being a male with a country background I always thought freezer paper was for freezing next year's dinner after the hog count was down by one! But, now I find out that it is the crafter's and quilter's friend. It even says so on the box!
And, if you have an eCraft and you want to cut fabric without adding an adhesive backing, then that freezer paper is going to be your friend, too. Sara, of Craftwell, filled us in on their preferred method for cutting fabric and it involves applying freezer paper to both side of the fabric before cutting and then, obviously, removing it after the cut.
Now, I told you that Denise, over at Purple Paper Paradise was running her eCraft at full throttle, so she's already tested Sara's method. Check it out!
PURPLE PAPER PARADISE TESTS FREEZER PAPER WITH FABRIC
In a few minutes I'm going to also try it. But, I think I'll include felt and faux leather. More later. Expect this article to grow.
FELT
I don't even have a sample to show you. I sandwiched felt between to sheets of freezer paper and it was a complete and utter failure.
FAUX LEATHER
Same story, but I WILL keep trying. I got farther along with it this time. So, we might be getting closer. But, for now, it's a no go here. In this case, I think my problem was attempting to cut with too high a pressure in a single pass. I think the secret might be a lower cutting pressure and more passes.
PREVIOUSLY CUT FABRIC
Like Denise, the cut with the adhesive applied to the back of the fabric was a bit cleaner than the freezer paper technique. However, subsequent freezer paper attempts yielded unexpected results and I believe it was due to the iron being too hot. So, I am going to say that it works. But, until I can get it to work with no tabs, the cleanup is not as easy as I would like to see. So, for me, the jury is still out on finding THE definitive settings.
PLEASE NOTE: I'm posting this image of the cut with freezer paper. ALL problems you see (including the nick at the top of one leaf) have to do with my clumsy attempts to cut the tabs with a pair of scissors.

All of my attempts to cut without tabs ended in failure. But, as I said, I think this had to do with the temperature of the iron. In the first cut, above, a Pressure Setting of 8 went clear through in one pass. In subsequent tries, it did NOT cut clear through. That tells me that something happened to the freezer paper's properties that made it tougher to cut. So, for now, I think my failures are operator issues rather than eCraft issues. Even though I do NOT think the image above paints a true long-term picture, it was what I ended up with on this particular test and you deserve to see it and make up your own mind.
Personally, I honestly don't see this as an eCraft issue.
Sunday, August 29, 2010
Cloth Yes! But, Method matters!
I did a quick test of cutting cloth this evening.
First, the good news. Using a piece of paper and some repositionable adhesive, it IS possible to cut cloth. We actually knew that from the CHA show. But, it's not enough to know that it cuts cloth. We need to know how various fabrics react in the eCraft cutter.
Unfortunately, I have no idea what this cloth is that I have cut. My maleness shows in the way I purchased this piece of cloth. "Gimme the cheapest light cloth ya got!" Uh... NOT the most scientifically useful purchasing method. Hey!!! I WARNED you I was clueless when you began reading this blog!!!


NOTE: I did the opposite stabilizing test from the one Denise used. She put the adhesive on the cloth. I put the repositionable adhesive on the cardstock. The method that Denise used might have reduced the unraveling of the cloth.
Actually , I should have said "Breaking News" because I just tried Denise's method with MUCH better success. Instead of putting the Xyron repositionable adhesive on the cardstock, I applied it directly to the cloth and then put the cloth on a cardstock backing. The results were starkly different. Take at look at how much better this method works than the method I first used.

I'm VERY impressed! Thanks, Denise!
First, the good news. Using a piece of paper and some repositionable adhesive, it IS possible to cut cloth. We actually knew that from the CHA show. But, it's not enough to know that it cuts cloth. We need to know how various fabrics react in the eCraft cutter.
Unfortunately, I have no idea what this cloth is that I have cut. My maleness shows in the way I purchased this piece of cloth. "Gimme the cheapest light cloth ya got!" Uh... NOT the most scientifically useful purchasing method. Hey!!! I WARNED you I was clueless when you began reading this blog!!!

Click on cloth to see the actual fabric Properties
Here is a close up of the lower left petal of the flower. You can see that I got exactly what I'd asked for... pretty cheap fabric.

Click on cloth to see the actual fabric Properties
Obviously, the cut was well done. But, the fabric, itself, failed. Even though the image shows a pretty ragged cut, a close look reveals that this was NOT the fault of the eCraft. I used no tabs. The next time I do this I will set the pressure a little lower to see it that helps. For this cut, I had it at 8 and I think it would have cut through this particular fabric at a 4 or 5.
The fabric stayed down flat. And, the cut IS the right shape. The fabric simply unraveled itself. I hope that I get a LOT of comments and suggestions for this article to guide me to a better purchase to test. Denise, for instance, got a much cleaner final cut. And, the cut in my backing was perfect.
So, as far as I'm concerned this was eCraft 1, Fabric 0.
NOTE: I did the opposite stabilizing test from the one Denise used. She put the adhesive on the cloth. I put the repositionable adhesive on the cardstock. The method that Denise used might have reduced the unraveling of the cloth.
UPDATE - UPDATE - UPDATE
Actually , I should have said "Breaking News" because I just tried Denise's method with MUCH better success. Instead of putting the Xyron repositionable adhesive on the cardstock, I applied it directly to the cloth and then put the cloth on a cardstock backing. The results were starkly different. Take at look at how much better this method works than the method I first used.

Click on cloth to see the actual fabric Properties
I'm VERY impressed! Thanks, Denise!
Tab Density Explored
Since the eCraft does not use a mat to hold the paper and cut shape in place it needed to have something to stabilize the cut shape while being cut from the base paper. The designers turned to something they called "Tabs" which are little uncut portions of the shape path that form a bridge between the shape and the base paper from which it is cut.
In an earlier video, we saw that the way the tabs are formed is that the blade of the eCraft is lifted from the material being cut for a split second by the Blade Solenoid. This action is what causes the clicking sound we hear as the eCraft cuts.
TAB DENSITY
There are two settings that we can use to control the way the tabs are created. The first of these is the Tab Density. We've already seen, in an earlier article how we set Tab Density. Now we will turn our attention to how it behaves while cutting and if it has any significant impact on the quality of the cut.
The first thing we need to know is that Tab Density is only going to be effective with larger shapes.
Tab Density adjusts the distance between tabs. In smaller pieces, there is little to gain by increasing the number of tabs. So, it seems to ignore Tab Density in smaller shapes. Consider this image:

This flower was cut at a size of 3" twice. The first time the Tab Density was set to 1 and the second time the Tab Density was set to 2. Yet, the number of actual tabs on both is exactly the same, 12 Tabs. The reason is that the firmware of the eCraft probably knows that the image is so small that putting more tab connectors in place would be a waste of effort and just make the piece hard to extract.
But, does the density behave differently as we begin to cut bigger shapes? In this next image, we have cut the flower at a size of 5" with a Tab density of 1 and a Tab Width of 3. This results in 24 tabs. Notice that the tab density naturally increased to twice the number used for 3".
Now, look at this same flower that was printed with a Tab Density of 2 and a size of 5". A higher tab density appears to have made very little difference. In fact, the Tab count only increased by a single extra Tab.

This is not all that significant a change. This leads us to question if it's worth bothering with changing the Tab Density at all. The best way to test this is to try even larger shapes. And, this time, we will set the Tab Width to 1. Perhaps the eCraft's firmware first looks at Tab Width and determines if it's going to apply Tab Density based on width.
In this image the size of the cut is 7", the Tab Density is set to 1 and Tab Width is set to 1. It's interesting that both the 5" shape and the 7" shape, with a Tab Density of 1, produced 24 tabs. This would lead us to believe that Tab Width probably was NOT a factor.

So, now the big test. Let's look at a 7" Flower Shape cut with a Tab Density of 2 and a Tab Width of 1.

The number of Tab produced jumped from 24 to 33. So, it is obvious that the effect that the Tab Density Setting is going to have is largely dependent on the size of the cut shape. But, is it all that much more effective? I'm not so sure. There seems to be a random aspect to the placement of the additional tabs, at least in this shape, that renders at least some of the added tabs marginally effective. At the bottom of the image we have two Tabs very close together and the same is true at the far right about 3/4 down.
My conclusion is that unless a piece fails at a Tab Density of 1, I'm no longer going to bother with a Tab Density of 2. I might change my mind on 11" shapes. But, it seems to me that shapes at that size face much less stress from tight corner cuts. Tab Density just does not seem to be all that significant to me based on these limited tests. Will see if that assessment holds up in real world projects.
A SIDE NOTE
Cutting the Flower shape at a size of 7" resulted in an interesting artifact. The closing cut along the path was slightly offset from the starting cut of the path. I don't know if this is a path issue or a firmware issue. But, you can see it at the very top petal of both 7" flowers. It easiest to see by clicking on the image twice. The second click will bring up the largest version available.
In an earlier video, we saw that the way the tabs are formed is that the blade of the eCraft is lifted from the material being cut for a split second by the Blade Solenoid. This action is what causes the clicking sound we hear as the eCraft cuts.
TAB DENSITY
There are two settings that we can use to control the way the tabs are created. The first of these is the Tab Density. We've already seen, in an earlier article how we set Tab Density. Now we will turn our attention to how it behaves while cutting and if it has any significant impact on the quality of the cut.
The first thing we need to know is that Tab Density is only going to be effective with larger shapes.
Tab Density adjusts the distance between tabs. In smaller pieces, there is little to gain by increasing the number of tabs. So, it seems to ignore Tab Density in smaller shapes. Consider this image:

Click on Image for Full Size
This flower was cut at a size of 3" twice. The first time the Tab Density was set to 1 and the second time the Tab Density was set to 2. Yet, the number of actual tabs on both is exactly the same, 12 Tabs. The reason is that the firmware of the eCraft probably knows that the image is so small that putting more tab connectors in place would be a waste of effort and just make the piece hard to extract.
But, does the density behave differently as we begin to cut bigger shapes? In this next image, we have cut the flower at a size of 5" with a Tab density of 1 and a Tab Width of 3. This results in 24 tabs. Notice that the tab density naturally increased to twice the number used for 3".

Click on Image for Full Size
Now, look at this same flower that was printed with a Tab Density of 2 and a size of 5". A higher tab density appears to have made very little difference. In fact, the Tab count only increased by a single extra Tab.

Click on Image for Full Size
This is not all that significant a change. This leads us to question if it's worth bothering with changing the Tab Density at all. The best way to test this is to try even larger shapes. And, this time, we will set the Tab Width to 1. Perhaps the eCraft's firmware first looks at Tab Width and determines if it's going to apply Tab Density based on width.
In this image the size of the cut is 7", the Tab Density is set to 1 and Tab Width is set to 1. It's interesting that both the 5" shape and the 7" shape, with a Tab Density of 1, produced 24 tabs. This would lead us to believe that Tab Width probably was NOT a factor.

Click on Image for Full Size
So, now the big test. Let's look at a 7" Flower Shape cut with a Tab Density of 2 and a Tab Width of 1.

Click on Image for Full Size
The number of Tab produced jumped from 24 to 33. So, it is obvious that the effect that the Tab Density Setting is going to have is largely dependent on the size of the cut shape. But, is it all that much more effective? I'm not so sure. There seems to be a random aspect to the placement of the additional tabs, at least in this shape, that renders at least some of the added tabs marginally effective. At the bottom of the image we have two Tabs very close together and the same is true at the far right about 3/4 down.
My conclusion is that unless a piece fails at a Tab Density of 1, I'm no longer going to bother with a Tab Density of 2. I might change my mind on 11" shapes. But, it seems to me that shapes at that size face much less stress from tight corner cuts. Tab Density just does not seem to be all that significant to me based on these limited tests. Will see if that assessment holds up in real world projects.
A SIDE NOTE
Cutting the Flower shape at a size of 7" resulted in an interesting artifact. The closing cut along the path was slightly offset from the starting cut of the path. I don't know if this is a path issue or a firmware issue. But, you can see it at the very top petal of both 7" flowers. It easiest to see by clicking on the image twice. The second click will bring up the largest version available.
Purple Paper Paradise is SMOKIN'!!!
It's a good thing that Craftwell decided to put a heavier duty motor in the eCraft before it was released. Otherwise, there would be one smoking machine with a red hot motor at the home of Purple Paper Paradise.
Since Denise, over at Purple paper Paradise, got her eCraft she has been keeping the motor on her machine spinning in overtime with her great tests of the cutter with many types of paper in many different configurations. Wait until she gets her air conditioning bill! LOL!
Denise's ultimate goal is to create the ultimate eCraft Settings Chart of the widest variety of materials available. And, she's asking for your help, too. You can find her contact information on her site so that you can report YOUR tests with your favorite papers and materials.
Purple Paper Paradise eCraft Settings Chart
Another person that is going to have a high air conditioning bill trying to cool a smoking machine is Julie Flanagan (CraftyMusician). You'll find that she has contributed many of the settings in the chart. Thank them both for a terrific chart format that includes special notes for each paper.
And, if you want to find the place where people like Denise and Julie hang out, then hop over to the eCraft_Crafters Yahoo Group. Kim Bush of Cutters Creek has done a great job of bringing together eCraft owners and potential eCraft owners to provide support and ideas for each other.
If YOU have a site where you are reporting your own testing or if you have posted videos please let me know so that I can make sure everyone knows about them as quickly as possible. The faster we get to know our eCrafts, the sooner we'll be able to have more fun with them and the more we will be able to do. I don't mind people leaving my site to get the information they need. I make the same money from this site either way... which is precisely nothing! :)
Saturday, August 28, 2010
Positive news on Core'dinations ColorCore
There is a reason why a community is important. And, nothing can illustrate this better than my previous article and this one. I had demonstrated that one COULD cut thin papers with the "Tips and Tricks" recommendation from Sara at Craftwell. But, my use of the highest tab settings did make it difficult to remove the piece. Nicki, on the other hand, found that you could cut with a setting of NO tabs. That was as good news to me as it was for you.
Right on the heels of that we have another great find by Denise at Purple Paper Paradise
I had little success with Core'dinations ColorCore. It turns out that the type of Core'dinations ColorCore that I'd tried is a challenge. But, many other Core'dinations ColorCore colors and styles worked quite well.
What I like about her article is that she shows us the good, the bad and the ugly as she tests each paper. Not only that, but she gives us the settings that she used to get the results that she's reporting.
Even if you don't use Core'dinations ColorCore, I'd urge you to jump over there and read her review as her testing technique would be helpful with ANY paper.
Denise's Core'dinations ColorCore Tests
One more step forward in understanding our eCraft machines. Don't you love it!
New Video from Nicki's Cardstock Creatons shows Intricate 2" Cut
Nicki, at Nicki's Cardstock Creations, has stepped up the testing on light paper with intricate cutting to find that she could cut WITHOUT TABS! In my tests, I had gone in the opposite direction and INCREASED TABS making the shape more difficult to remove.
Her test should be VERY GOOD NEWS for a lot of people in the fence about the eCraft!
Once again, it was Nicki that did the test and created the video, so she deserves to have you watch it on her site. So, I will just link to it here:
eCraft - Using Pattern paper and small detailed designs
I KNOW that shape and I was very surprised by her result. That is a significant video! Nice going Nicki!
We should mention that Sara of Craftwell provided the basic dual layer approach. We simply tool it two different directions while confirming Sara's advice.
Friday, August 27, 2010
The Reality of a New Concept Product
I get both good and bad reports about people's first experience with their eCraft. This is to be expected. Griping is one thing. But, serious communications about reservations people might have are not only good for other potential users. They are good for Craftwell. While they would like to make a sale to everyone, the reality is that they will not. And, knowing why not is just as important as knowing why someone did buy. Here is a very thoughtful communication I received today and I thought it was important to share it with you. It would be easy for me to say, "Oh no! Don't do that! Buy an eCraft now!" But, that kind of thinking is something I disdain. Machines are not religious experiences. And, all machines have strengths and weaknesses and that is especially true of an introductory model. But, the reader did ask one question that I CAN answer directly. At this point in time, which cutter would you chose, Gazelle or eCraft?That one is easy for me because she is seeking my personal preference, not asking me to tell her what to buy. And, I am VERY comfortable saying that, hands down, I would choose the eCraft over the Gazelle for what we have planned. First, it is a marvelously engineered machine. Back in the 1980's I worked with a computer company called Mindset that earned a place on permanent exhibit at the Museum of Modern Art in New York City. I would not be surprised if the eCraft also earns awards and recognition for its wonderful design. Secondly, my Gazelle just doesn't have to growing room that the eCraft presents. It just does not have the room to grow like the eCraft built into its fundamental design. Yes, there are issues that we must address with this new product. And, right now Craftwell is swamped just trying to get machines out the door. But, they care. And, they care a lot. I have no doubt that they will strive to get EVERYTHING right in a way that pleases both new and old users. I can't promise that. But, every communication I have with them lacks the defensiveness that I've so often faced when discussing potential problems. If the writer needs a little more time to decide yes or no regarding the eCraft they should be encouraged to do so. There is nothing worse than buyer's remorse. But, they promise to stick around here and, did you notice that they are going to take another look at the eCraft this weekend. Now, THAT is my kind of person. I admire them and thank them for sharing with us their feelings. |
Setting Tab Density and Tab Width
Setting the Tab Density and the Tab Width is accomplished in the Mode Selection screen. Now, that screen can pop up and disappear quite quickly, so it's important to know that should it get past you, all you have to do is to press the MODE/BACK button to bring it up again. In fact, if you immediately press the MODE\BACK button as the machine is starting up it will stop at the Mode Selection screen.
I've had some questions about how the Tab Density and the Tab Width settings should work. Here is a short YouTube video that demonstrates it.
I've had a couple of reports that some users are having difficulty getting the Width to change. It's not been a rash of reports. But, if you are using the techniques in the above video and are not getting the same results as you see in the video, you should contact Craftwell.
Thursday, August 26, 2010
Thin paper Success - Craftwell Tips and Tricks!
I apparently lied when I said I was going to bring out a different camera for the next videos. For this quick test of a suggestion from the "Tips and Tricks" page on Craftwell's home page I am indeed using the infamous Bloggie. It is just SO convenient. And, I'm not trying to prove that I'm Cecil B. deMille. My only goal is to get things up here quickly that will make your life with your eCraft a LOT more pleasant.
And, this suggestion from Craftwell will do just that.
The suggestion is to layer a thin piece of paper over a moderately heavy cardstock and use a pressure setting of around 2. To test this suggestion I naturally turned to our old friend the 3" Tree #1 on the Fundamentals #1 SD that came with our machines.
As a control, I first attempt to cut a tree from standard 20lb bond like we used in our inkjet printers. And, then, without pausing the tape I will immediately try cutting 20lb bond after layering it over a piece of very inexpensive 110lb Staples cardstock.
Here is the test:
As you can see the suggestions works very well. But, we did have some lifting of the lighter paper at one point and we had the highest tab density and tab width settings that make it a bit more difficult to remove the shape. So, I plan to test this same technique with just a couple of different twists.
The first change is to tape the top and bottom edges of the paper and cardstock together. Since tape is out of the cutting area, it should only serve to hold the lighter paper down flat. If my guess is correct we should be able to lower at least the Tab Width andmake it easier to extract the cut shape.
The second experiment will be to use the Xyron and apply a repositionable adhesive to the cardstock. "WHOOOAAAA!!!", you say, "Isn't that using a mat after all?" W-e-l-l sort of... But, with this one difference. It's MY CHOICE. And, I can cut right rhough it all if I want to.
At any rate, we'll see how it goes the next time I get to test this. And, just because you questioned me about the "mat" I'm going to sit in that same noisy chair and use that same focus hunting Bloggie!!! That'll fix ya!
Great question about the Blade Cover on the eCraft Facebook Page
On eCraft's Facebook page, Bernie Elsome-Jones, from the UK, asked this important question. "Do you remove the blade cap before cutting?"
I remove the blade cover because I want the video to be able to capture what is happening as the eCraft cuts. But, that can be a bit misleading as it suggests that users should also remove the blade cover before cutting.
The eCraft support staff immediately gave her this reply, which all of us needed to know definitively.
What in the world did we do before we had the contributions of users from around the world helping all of us learn and grow?
Maybe because this post is about a world-wide community asking questions and finding answers it might be a good time to thank the followers of this blog. Followers is probably a poor description for the value they bring to the success of the information that this blog can provide to those interested in digital die cutters with computer interfaces. Every comment and suggestion for a test that you make moves us that much closer to our goal of getting the full value out of our tools. THANK ALL OF YOU!
I remove the blade cover because I want the video to be able to capture what is happening as the eCraft cuts. But, that can be a bit misleading as it suggests that users should also remove the blade cover before cutting.
The eCraft support staff immediately gave her this reply, which all of us needed to know definitively.
eCraft by Craftwell Bernie and Tom- You should ALWAYS cut with the blade safety cap on EXCEPT when trying to cut a thick material like foam that won't fit underneath the trolley while the cap is on. Removing the cap during regular cutting can cause tearing, so we recommend leaving it in place!There we have it, many thanks to Bernie. Nice job!
What in the world did we do before we had the contributions of users from around the world helping all of us learn and grow?
Maybe because this post is about a world-wide community asking questions and finding answers it might be a good time to thank the followers of this blog. Followers is probably a poor description for the value they bring to the success of the information that this blog can provide to those interested in digital die cutters with computer interfaces. Every comment and suggestion for a test that you make moves us that much closer to our goal of getting the full value out of our tools. THANK ALL OF YOU!
Keep Checking The Craftwell Site
As they get time, and feedback from customers, the Craftwell team seems to be updating their web site to include more useful information. I don't know if I just missed it earlier or it's a new addition. But, on their "Tips and Tricks" page they now list some important information about cutting lighter papers and also have included some starting pressures for various papers.
One of these suggestions is to use a moderately heavy piece of cardstock under lightweight paper and use just enough pressure to cut through the first layer of paper. I'll try that this evening and let you know how it goes. I have a variety of lightweight papers that I've avoided trying until I had some hope of their being cut correctly most of the time. This will be a good test.
There is one modification that I will add. I think I will tack the two pieces of paper at the botton with 3 small pieces of tape so that the lightweight paper is stretched securely over the heavier paper. In this way, the lightweight paper should be less likely to bend against the blade.
I'll try it both ways and let you know. I'll also try switching video cameras this evening. NOTHING is more convenient that the Bloggie. But, that constant hunting for focus is driving me crazing and I'm sure you are as annoyed as I am when it happens. It's one thing to create quick and not-so-slick videos to get the information out and quite another to be just plain annoying about it. It's my job to tease and annoy my family' but, it's NOT my job to tease and annoy you.
And... speaking of annoying. My granddaughters decided my iPhone was boring. So, they downloaded some great games on it. The only problem is that they also PLAYED the games, racking up a high score that is IMPOSSIBLE for poor PopPop to ever hope to achieve. So, every game ends in another failure to put my name at the top of the high score list leaving me to realize that I'm no match for a 10 and a 7 year old! NOW do you see why it's my job to annoy them??? Revenge! Sweet Revenge!
OK... enough of my whining... back to work discovering the beauties of the eCraft.
Wednesday, August 25, 2010
Trolley Bumpers and that Grinding Noise
As more and more people take delivery on their eCraft machines a few spot some things that don't seem quite right. One issue that came up in the eCraft_Crafters Yahoo group was a blade trolley with irratic travel.
Fortunately, Trish C had already encountered a similar problem and was able to fix it. It turns out the two bumpers on either side of the eCraft's cutting area are not simply passive bumpers. They are actually switches that turn off the movement of the trolley in the appropriate direction. I created this video to demonstrate what Trish C found. Brilliant Find. That is one sharp group of people.
The other issue that crops up is an occasional grinding sound. We dealt with that a little bit earlier. But, since I had the trusty Bloggie out, I thought I'd make a short video that demonstrates where all that noise comes from and why.
Earlier, I had thought the grinding sound was the rasp surface of the lower roller against the mterial. But, it's better than that. It's a design feature. It appears to me to be a safety mechanism in case we try to load materials into the machine that might be too thick. the pulley or whatever drives the lower roller has a mechanism that gives when the lower roller is facing too much stress. And, while it may sound scary that is a good thing.
I sure do wish the Bloggie had a manual focus. It is SO convenient. But,that constantly hunting auto focus drives me crazy! Even so, it does the job of getting information out to you quickly.
Excellent Tutorial on creating a layered shapes with the eCraft
Nicole Boucher-Whitaker of Nicki's Cardstock Creations Blog has created an excellent tutorial on using the eCraft to create multi-layered shapes using the Tulip shapes found on the Fundamentals #1 SD chip that comes with the eCraft.
The first video demonstrates how to load paper, select a shape and cut it. The second video shows how to create a finished card with the shapes that were cut.
Apparently, Nicki plans on producing a series of videos on using the eCraft. I find her videos to be very clear and her pacing excellent. She has taken the time to overlay settings that she used so that it's very clear as to the settings she has found that works with the materials she was using. Brazzil was used in these first videos.
I certainly recommend viewing it and I look forward to seeing many more from Nicole. Nice job!
While the videos are posted on YouTube and I could embed the videos here, I really feel that when a person takes the time and effort to create a video for us, then we should visit their site so that they have the opportunity to show you other things they have to offer.
Tuesday, August 24, 2010
The eCraft's "Clicking Sound"
Anyone that has seen any video of the eCraft cutting knows that it makes a distinctive clicking sound. So, what is that anyway?
First, every cut seems to start with two clicks. If you watch carefully, you will see the trolley move, then stop its travel while the blade solenoid thrusts the blade down into the media twice. I don't know exactly why every cut begins this way. But, I will offer a guess.
The blade is only held into the blade housing by magnetism. This means that the machine really can't be sure if the blade is firmly seated in the housing. One guess would be that the housing is thrust down to make sure that the blade is all the way up into the housing firmly. But, there might be another reason or an additional reason.
Early specifications and marketing materials for the eCraft indicated that the machine, itself, could figure out the pressure needed to cut any material. The way that the eCraft could judge this is by piercing the material and applying pressure until contact is made between the blade and cutting plate. It appears to me that the blade acts as a switch when it comes into contact with the cutting plate, turning on the blue light. So, if the blade is thrust into a material and the blade is NOT able to pierce clear through, the machine knows that it must increase the pressure.
Then there are the clicks that occur while the eCraft is actually cutting a shape. I believe these clicks tell us how many TABS are being created for the shape. Actually, what sound like a single click while it's cutting is two very rapid clicks as the solenoids are turned off and on for each tab. The first click lifts the blade and the second click thrusts the blade back into the material.
Here is a very short video of the eCraft cutting a heart. I've specifically tried to count the clicks as the cut is made.
I've purposely scanned this shape in at 1200dpi so that the tabs would be easier to spot. Apparently, my count in the video was wrong. It looks like there were 7 tabs. It will be interesting to go back and listen to the video and see where I missed a click! You can click on the image below to see the full sized scan.

While I can't be sure if my theory about the first two clicks are right, we can definitely see that the subsequent clicks are all related to creating the tabs.
By the way, I'm not showing any nicks at all on the cutting plate of the eCraft in spite of the many cuts at the highest pressure that have been made on this machine,
Some hopeful news about Chipboard.
I had no success at all with the material that was sold to me as chipboard. None. The blade didn't even penetrate the surface. So, I was relieved and happy to learn that another user DID have success with chipboard.
Here is what Julie (CraftyMusician) had to say on the Yahoo eCraft_Crafters group.
.
I find the eCraft_Crafters group, moderated by Kim Bush of Cutters Creek, is the most active group of eCraft users and we're learning a lot as more and more people are beginning to test their new machines. I urge you to join this group if you own or are interested in the eCraft.
Here is what Julie (CraftyMusician) had to say on the Yahoo eCraft_Crafters group.
Chipboard that is 0.022 thickness, white on one side, does not feed via the paper tray. Manual feed through the front, and set multi to 3. It cut through cleanly on the third pass. It was set to cut tabs, but there were no tabs connected after the third pass. I also cut the star with no tabs without a problem. I was impressed with the multiple passes all cutting in the same place. I did have to clean the debris off of the blade after cutting each shape. One time chipboard fibers clogged the opening in the blade cover, and it wouldn't cut at all until I blew on it to clear the opening.Julie's review covered a wide range of things that she's discovered in her exploration of the eCraft. I had not even thought to review proportions until Julie found that the square is not square! That is the wonderful thing about communities, each of us brings a different perspective to the table and everyone benefits. I urge you to read her full review on the eCraft_Crafters Yahoo group. I expect to learn a lot more from her and others in the group as more and more machines are delivered to people with experience.
.
I find the eCraft_Crafters group, moderated by Kim Bush of Cutters Creek, is the most active group of eCraft users and we're learning a lot as more and more people are beginning to test their new machines. I urge you to join this group if you own or are interested in the eCraft.
Bazzill Swirling Shapes
This next set of test cuts presents more challenges to the eCraft than the basic shapes. These challenges come in the form of sharply reversed directions and more intricate paths. When possible we set the size to 3". But, the smallest available for some of the shapes is 3-1/2" and even then we had to find the right tab density and tab width to make a clean cut. The settings were:
Tab Density = 1
Tab Width = 1
Multicut = 1
Size = 3" and 3-1/2" (Depends on smallest available)
Pressure = 4
Here is the for group in this set that we'll examine.

The lighter shapes were all cuts made with a Tab Density of 1 and Tab Width of 1. All were successful except for the shape in the lower right corner. This shape failed twice at the very same place each time when using the Tab Density of 1 and Tab Width of 1. It's interesting that the place where it failed didn't seem the most challenging area of the cut. So, it must have to do with the direction of the path.
But, as you can see by the red shape right beside the failed cut, just changing the Tab Density to 2 and the Tab Width to 3, the cut was successful. This is the first time that we had to increase tab values with Bazzill paper. And, oddly enough, it was not with the tiniest or most intricate shapes. Very interesting.
By the way, clicking on the image should allow you to view the full size version so that you can see the tab remnants. There is no doubt, that left as they are when the shape is separated, they can be seen even when the tab settings are low. I find it acceptable. But, some might not. It should be noted that the tabs are easily burnished off. I don't remove them for these tests so that you can make up your own mind about whether or not they are something with which can accept.
What was interesting to me was that I can't see MORE tabs on the red shape as one would expect. Nor, do they look at that much bigger. But, it was more difficult to separate from the base paper, so SOMETHING was different.
This next set includes one shape (Wings) that failed on the first attempt at Tab Density of 1 and Tab Width of 1. But, at the second try it was successful and clean.

The final set in this series included a shape that failed twice at Tab Density of 1and Tab Width of 1. When this happens I adjust the tab settings. I've included both the failed cut and the successful cut. The red shape, therefore, was successful at Tab Density of 2 and a Tab Width of 2.

I'm gaining more and more confidence with cutting shapes with Bazzill paper. I have not changed the blade since starting the original Basic Shapes set and it was a used blade then! Some of these shapes, I would assume would be challenging with ANY cutter. Again, the tabs don't bother me; but, they are clearly visible in some of the shapes and that has to be a consideration for some.
I hope this is helpful to demonstrate the kind of performance that one can expect with the eCraft with something like Bazzill paper.
Monday, August 23, 2010
Building a Suggested Settings Matrix
One of the things that would be helpful to all of us would be to have a matrix of settings that eCraft owners have found that cleanly cut every size of every shape on the Fundamentals 1 SD card included with the eCraft with the most commonly used papers.
I suggest starting with some average weight cardstock between 50 lb to 110 lb (135 to 300 g/m²). For myself, I have decided to test 65lb/176g/m² since I can find these weights in abundance at relatively low cost. Higher weight papers will add another factor, the number of multicuts. I don't expect to need multicut with this weight.
What we may want to do is to parse out testing of individual shapes. There are a lot more test subjects on the Fundamentals 1 SD card than first meets the eye with ALL the sizes for ALL the shapes are counted. Some shapes will be very easy. The heart, for instance, can be cut at 5" or 1/2" from 65lb/176g/m² at the same setting of:
Density: 0
Pressure: 1
On the other hand, it took a bit more experimentation to find the right setting for Tree #1 at 3". In this case, it took a setting of:
Density: 2
Width: 2
Pressure: 6
Bazzill Basic Shapes (Circles, Squares, etc.)
I purchased a 100 sheet pack of Bazzill Basic Paper Premium Cardstock (CoreDyed) to test because I've been told that this is a commonly used paper for crafts. I thought I would take the opportunity to test various shapes with this paper and see how it performed not just on a few shapes; but, ultimately with EVERY Shape available with the eCraft's Fundamentals #1 SD card.
I plan to use a size of 3" when I can with the following settings.
TAB DENSITY = 1
TAB WIDTH = 1
MULTICUT = 1
SIZE = 3
PRESSURE = 4
Here is the first set that I cut this evening. Every one of them cut cleanly.

Here is the second set in this series.... Notice that some make use of the pen.

This is the last of basic shapes at 3". I'm not going to drive myself crazy by trying to lay down the shapes neatly for scanning because when I close the cover they all move anyway! So, you'll have to put up with the chaos.

I started cutting these shapes with a used blade that showed signs of light tip wear and did not change the blade. So, I'm impressed by the fact that all the cuts look so nice. There were NO failures.
I did NOT have the same success with the next series of cuts using the swirling figure set. I lost my key to the shapes, so I'm making up names as I go along. I will be changing blades before moving on to the second series of cuts which I will post tomorrow.
Versatile Microscope Tool
There are some tools that are almost as useful as the hairpin, paper clip or tweezers. Yet, very few people know about them. One of these is called a Stereo Microscope or, alternately, a Dissecting Microscope. In past years, they were so expensive that no matter how useful they might be they were simply beyond the average person's budget.
The SMZ-04, for instance, that I showed in an earlier article sell for over $700 at the linked URL. I would NEVER suggest someone buy an SMZ-04 as a crafting tool. The good news is that as expensive as that high end scope is, it is NOT my favorite Stereo Microscope. Nor, do I think the optics are all that much better than my favorite Stereo Microscope.
Here is my favorite Stereo Microscope and I DO recommend it for crafting and just about about everything else around the house. It gets used a lot. It's the 20 power My First Lab iExplore Stereo Scope.

I use the CA Scientific version of this microscope. But, I just found another source with an excellent price. BH Photo sells the Ken-O-Vision version of this same Chinese manufactured scope. I think it's fair to assume that they probably come from the same supplier.

At BHPhoto they sell the Ken-O-Vision 20x Stereoscope for just $67.50. And, believe me, that is a bargain. First, it is a great thing to have around if you have children and grandchildren. And, it's also a great thing to have around if you want to inspect things, like the condition of your blades. The following pictures were taken with the predecessor of the iExplore or Ken-O-Vision. The iExplore's and Ken-O-Vision's optics are better. But, we can clearly see that while there is some wear at the very tip, in a pinch I can re-use this blade.
 And, at different angle...

Suppose I'd come to the end of all my new blades and my new supply had not arrived yet. I have 20 used blades. But, which ones are hopelessly dull or broken and which ones might have a little more life in them. You won't have to guess with this versatile microscope.
By the way, if you are looking for a present for a child and your are thinking about a first microscope, this is the microscope I would recommend. A child can explore coins, printed images, their fingers, bugs, dolls, flowers... just about anything and everything. A Compound Microscope will be used less than a Stereo Microscope over the entire lifetime of the child.
Both of these scopes use a battery powered long-life LED lighting system. So, there is no need to plug it in to view your blades and bugs.
The SMZ-04, for instance, that I showed in an earlier article sell for over $700 at the linked URL. I would NEVER suggest someone buy an SMZ-04 as a crafting tool. The good news is that as expensive as that high end scope is, it is NOT my favorite Stereo Microscope. Nor, do I think the optics are all that much better than my favorite Stereo Microscope.
Here is my favorite Stereo Microscope and I DO recommend it for crafting and just about about everything else around the house. It gets used a lot. It's the 20 power My First Lab iExplore Stereo Scope.
I use the CA Scientific version of this microscope. But, I just found another source with an excellent price. BH Photo sells the Ken-O-Vision version of this same Chinese manufactured scope. I think it's fair to assume that they probably come from the same supplier.
At BHPhoto they sell the Ken-O-Vision 20x Stereoscope for just $67.50. And, believe me, that is a bargain. First, it is a great thing to have around if you have children and grandchildren. And, it's also a great thing to have around if you want to inspect things, like the condition of your blades. The following pictures were taken with the predecessor of the iExplore or Ken-O-Vision. The iExplore's and Ken-O-Vision's optics are better. But, we can clearly see that while there is some wear at the very tip, in a pinch I can re-use this blade.


Suppose I'd come to the end of all my new blades and my new supply had not arrived yet. I have 20 used blades. But, which ones are hopelessly dull or broken and which ones might have a little more life in them. You won't have to guess with this versatile microscope.
By the way, if you are looking for a present for a child and your are thinking about a first microscope, this is the microscope I would recommend. A child can explore coins, printed images, their fingers, bugs, dolls, flowers... just about anything and everything. A Compound Microscope will be used less than a Stereo Microscope over the entire lifetime of the child.
Both of these scopes use a battery powered long-life LED lighting system. So, there is no need to plug it in to view your blades and bugs.
Fun , Fast, easy to use! NOT hyperbole.
One of the things that use to bother me immensely when I was in the video game business was the fact that our packaging was just plain downright deceptive. I don't know how many of the readers of this blog were old enough to have a video game system back in the early 1980s, but the graphics were REALLY crude back then. But, you;d never guess is by the packaging and flyers. Here's a sample.

But, here is what you REALLY got!

At least this next one showed the actual graphics one saw when playing the game. But, that is not what caught the eye of the consumer as they scanned the video games on the wall at the stores.
Then there were my discussions with Alan and Stephen Hassenfeld of Hasbro, when we talked about how toys and games were priced. Hasbro is really NOT a toy and game company. It is, fundamentally, a plastics company. Toys and games are a means of moving plastic. But, the cost of the plastic in the games is insignificant. So, it is the advertising budget that sets the cost of a toy. And, one sentence still rings in my head. Well, bangs around in my head, so I'll have to paraphrase... "The bigger the smile on the actors, the less likely the game is to actually be fun!" Over the years I've found that to be 100% true. I don't buy games where the actor's smiles in the ads look like a happy face on steroids!
So, it is a delight for me to report that the eCraft packaging, with the slogan, "Fun, Fast and Easy to use!" is not deceptive hyperbole. It's the truth. And, this past weekend brought that home to me is a big way. It's fun. A LOT of fun. And, it's fast. In fact, maybe a bit too fast. And, since all my granddaughters wanted to me to do was get out of the way after showing them the controls, I think it's safe to say that it is, in fact, easy. At least easy enough for an 8 year old to operate it with proficiency!
I know that some of you are thinking. It's electronic. Of COURSE an 8 year old can do it. So, how about this one. It's at least easy enough for a sixty six year old with more than their fair share of head injuries to use it with some proficiency. Does that work better to prove the point?
But, had they added one more word.... "inexpensive" then I would have had to take real issue with them. This thing is going to cost me a FORTUNE in paper costs and it's going to be hard to explain all this glitter on my hands, clothing and what's left of my hair!!!! That's the downside of Fun, Fast and Easy! It's going to get used and it's going to get used a LOT!
Brother, can you spare a dime????
Sunday, August 22, 2010
Hi-Speed Cut at 420 frames per second
Remember that Hi-Speed video camera I listed under the resources that I have available for analysis. Well here is the eCraft cutting in slow motion. While there is no sound, you will be able to determine where that clicking sound comes from and also see it creating a tab.
Have fun!
When shooting video at high speed you need a lot of light and while I have it a good try here, the lighting could have been better for you. I borrowed this particular camera; but, as helpful as it has been these last two days, it's definitely on my wish list!
Have fun!
When shooting video at high speed you need a lot of light and while I have it a good try here, the lighting could have been better for you. I borrowed this particular camera; but, as helpful as it has been these last two days, it's definitely on my wish list!
Paper Grain as a Possible Factor
Test Media: Kraft Paper
Yesterday, as my granddaughters and I had a great time playing with the eCraft, we didn't have a single failure. Not one.
So, today, I went out and picked up some of the paper that I'd used up with my granddaughters. Then. I set up the eCraft, expecting to routinely capture some images of the eCraft successfully cutting the papers with which we'd had so much success yesterday. In the first cut it failed with the same Kraft paper used yesterday. It was totally puzzling and made no sense at all.
The I realized that I have not been paying any attention at all to the grain orientation of the papers as I've been testing them. So, for my next test, I marked the top of the sheets as I pulled them out of the package. I then tried 8 different cuts using two different sheets of paper. Only one of the eight cuts was a failed cut. But, four of the eight cuts did have visible places where a cut piece lifted up and could have caused a failure or did cause a failure as in the case of one.
Interestingly, all four of the perfectly clean cuts were performed with the top of the paper or the bottom of the paper being inserted onto the eCraft. And, all four of the not as clean cuts were performed when the paper was inserted sideways.
This leads me to believe that grain of the paper, itself, is a factor in helping to ensure a clean cut. So, from now on, as I test, I am going to try to remember to put the paper into the machine so that the grain is pointed into and out of the eCraft. It is very easy to determine paper grain. If you get a clean fold then the fold is along the grain. If the fold has small creases along it, then the fold is across the grain.
I'd appreciate it if others might also observe if grain might have a bearing on any failures that you might have. It would seem logical that the lighter the weight of the paper, the more important paper grain might be. We'll just have to see.
Test Media: Core'dinations - Whitewash Collection
Core'dinations card stock is a very unusual paper that seems softer with layers that can be sanded for effect. The eCraft had trouble with this paper; but, in a very identifiable way. As the blade started against the grain, it would fail. Cuts along the grain were cleaner. How clean or how bad seemed to depend on the angle off of the grain direction. It might not be all that evident in this picture; but, as it cut you could see the effect that direction had on the paper itself. I would be surprised if someone finds a way to cut Core'dination highly textured, soft paper in the eCraft.

Test Media: DCWV The Autumn Splender Cardstock Stack
Not a single failure with this wonderful paper when placing the paper into the eCraft WITH the grain. But, turn it sideways and bad things happen. In these next two images, the only difference was the orientation of the paper when being placed into the eCraft. Because of the glitter, it was not as easy to identify the grain. But, the important thing is that like all paper, it does have a grain and changing the orientation of the paper relative to the cutter seems to make a huge difference in the potential for a successful cut.
Direction #1 - No failures in this orientation
 Direction #2 - 90 degree rotation of the paper - no successes.

Test Media - Colorbok Metallic
Colorbok paper comes in several different metallic surfaces. This is "Shiny Silver" sample delivers mixed results with the eCraft. In this sample, a Pressure setting of 4 seems to deliver the best cut. But, even so, there are obvious flaws. Orientation of the paper seemed to have less effect than the pressure setting.
Here is an image of the best cut I was able to achieve in any orientation.

Smother shapes should be a lot cleaner and on the other end of the spectrum, I didn't even bother to cut the 3" tree since the leaf, which normally is very smooth with heavier card stock was having such mixed results. The metal, like the glitter, might reduce the effect of the paper grain.
So, while it is NOT definitive, based on these limited tests, we might not be far off track if we start paying attention to paper grain as we try different media. Over time we should be able to either confirm or deny this theory as more of us try different media and report our findings.
Test Media: Wool Felt
I was asked, in a comment to try felt. I had actually purchased some to test; but, really haven't had the time to test it well. So, I decided to give it a try. What I;m posting here is my first attempt to cut felt. It is NOT a definitive answer to the question, "Can it cut felt?" It is merely the result of a quick attempt just because people are interested in it. I will do a more exhaustive test later.
The graphic will not do the eCraft's cutting of felt justice. The only test I've done used the Xyron adhesive to stiffen the felt. Other materials might be a lot better. But, I can say this, Yes, the eCraft was able to CUT the felt. But, with the slippery backing it was not able to position it as well as it needs to in order to make a cleanly shaped cut. And, the 'tabs' in felt must be cut with scissors or the felt can stretch and rip.
I ended up having to hold on to the felt and help pull it back out of the machine with slight pressure. A less slippery stiffener would not require that. Here is the first attempt at cutting felt. While not perfect, it is promising and deserves more exhaustive testing.

I had set the tabs to the widest width and I would not do that with felt in future tests. Most of the raggedness of the shape has to do with crude attempts to pull the tabs loose. But, there is some indication of the fact that I needed to help it push the felt out of the machine. Notice the right side, which is PULLING it back in is much smoother.
Yesterday, as my granddaughters and I had a great time playing with the eCraft, we didn't have a single failure. Not one.
So, today, I went out and picked up some of the paper that I'd used up with my granddaughters. Then. I set up the eCraft, expecting to routinely capture some images of the eCraft successfully cutting the papers with which we'd had so much success yesterday. In the first cut it failed with the same Kraft paper used yesterday. It was totally puzzling and made no sense at all.
The I realized that I have not been paying any attention at all to the grain orientation of the papers as I've been testing them. So, for my next test, I marked the top of the sheets as I pulled them out of the package. I then tried 8 different cuts using two different sheets of paper. Only one of the eight cuts was a failed cut. But, four of the eight cuts did have visible places where a cut piece lifted up and could have caused a failure or did cause a failure as in the case of one.
Interestingly, all four of the perfectly clean cuts were performed with the top of the paper or the bottom of the paper being inserted onto the eCraft. And, all four of the not as clean cuts were performed when the paper was inserted sideways.
This leads me to believe that grain of the paper, itself, is a factor in helping to ensure a clean cut. So, from now on, as I test, I am going to try to remember to put the paper into the machine so that the grain is pointed into and out of the eCraft. It is very easy to determine paper grain. If you get a clean fold then the fold is along the grain. If the fold has small creases along it, then the fold is across the grain.
I'd appreciate it if others might also observe if grain might have a bearing on any failures that you might have. It would seem logical that the lighter the weight of the paper, the more important paper grain might be. We'll just have to see.
Test Media: Core'dinations - Whitewash Collection
Core'dinations card stock is a very unusual paper that seems softer with layers that can be sanded for effect. The eCraft had trouble with this paper; but, in a very identifiable way. As the blade started against the grain, it would fail. Cuts along the grain were cleaner. How clean or how bad seemed to depend on the angle off of the grain direction. It might not be all that evident in this picture; but, as it cut you could see the effect that direction had on the paper itself. I would be surprised if someone finds a way to cut Core'dination highly textured, soft paper in the eCraft.
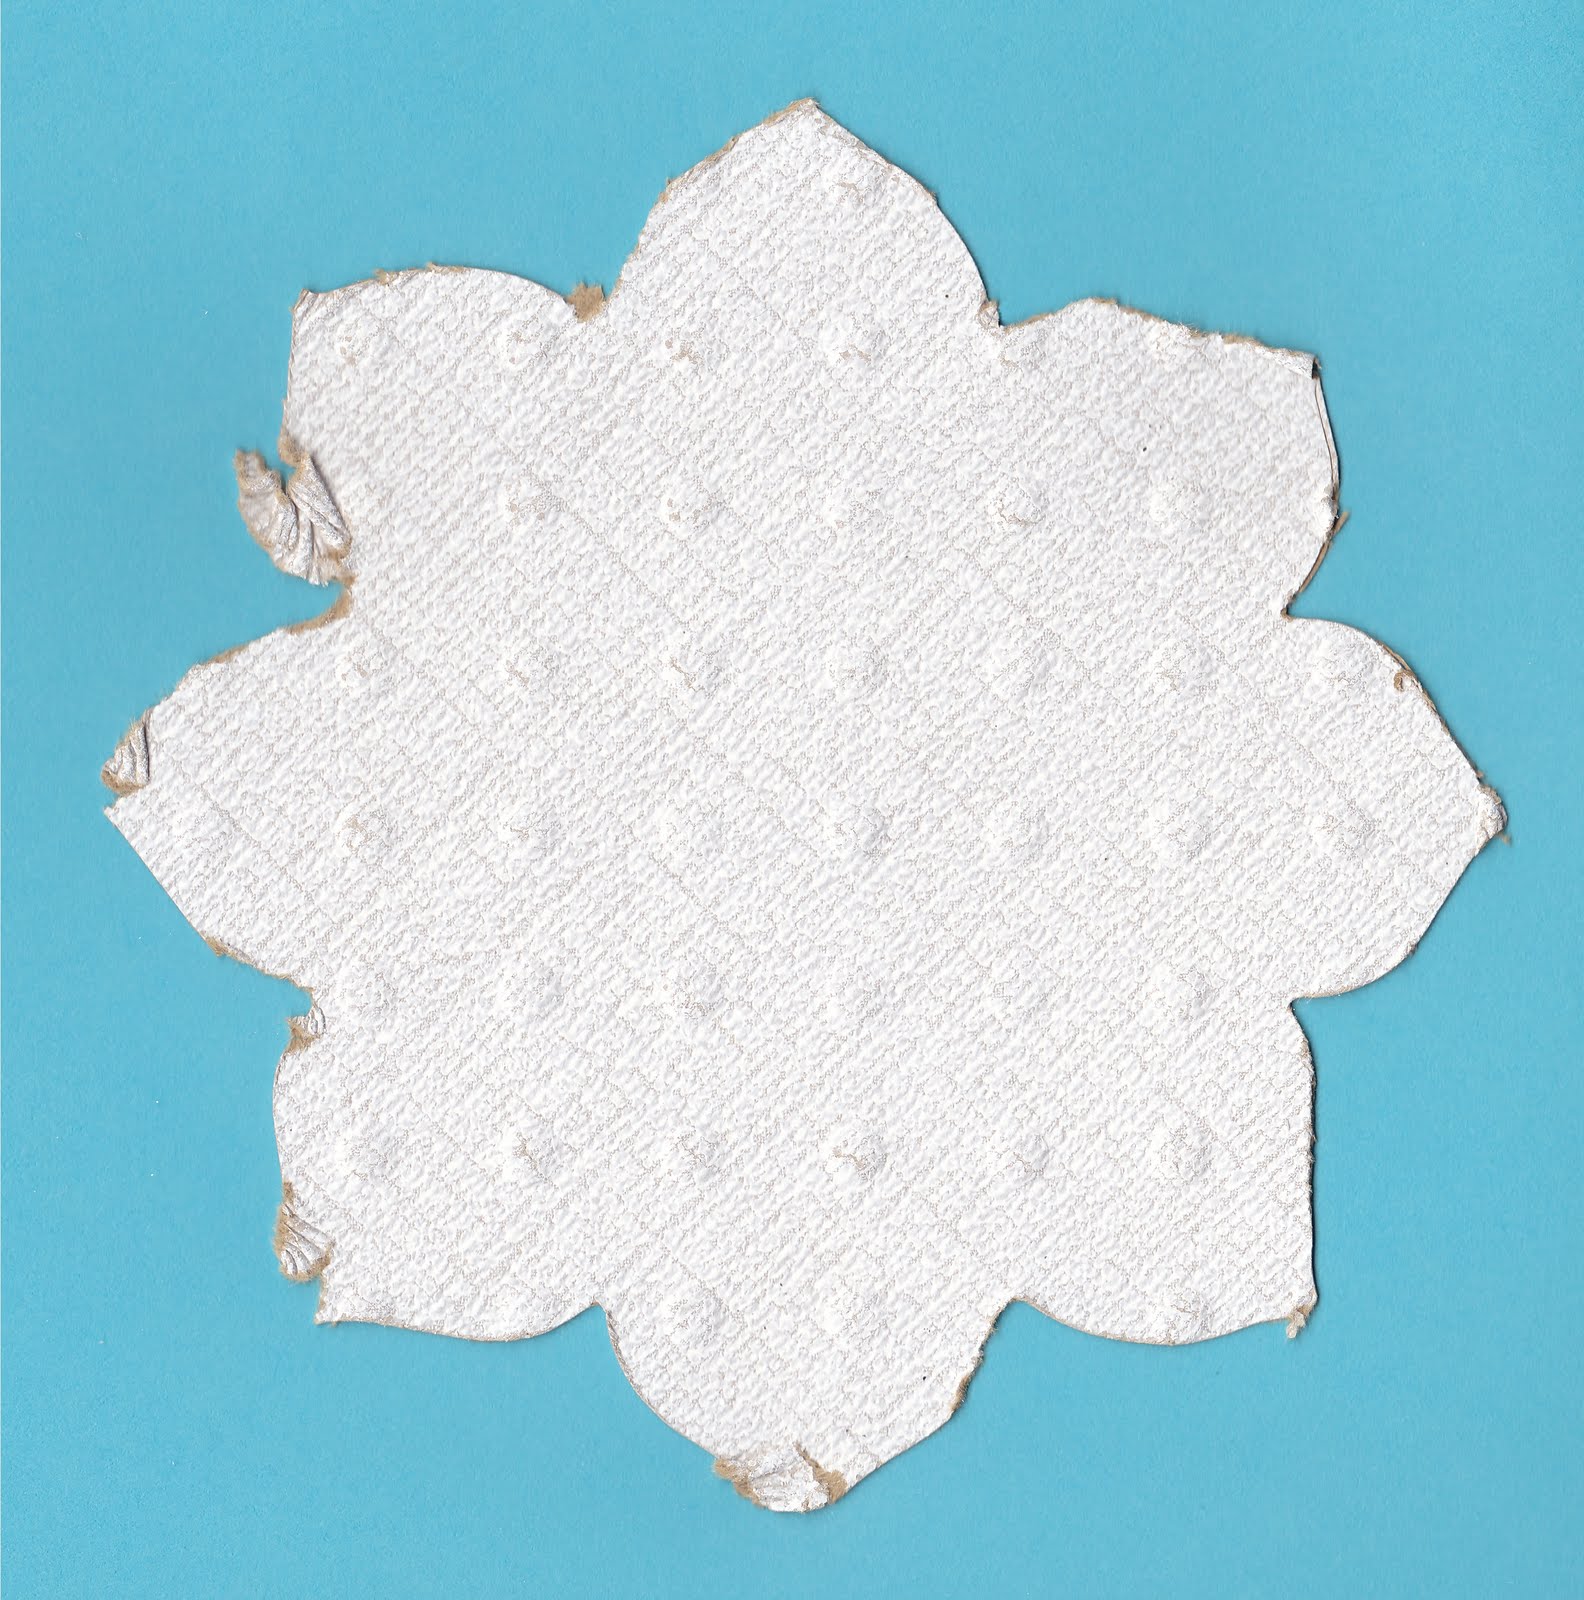
Test Media: DCWV The Autumn Splender Cardstock Stack
Not a single failure with this wonderful paper when placing the paper into the eCraft WITH the grain. But, turn it sideways and bad things happen. In these next two images, the only difference was the orientation of the paper when being placed into the eCraft. Because of the glitter, it was not as easy to identify the grain. But, the important thing is that like all paper, it does have a grain and changing the orientation of the paper relative to the cutter seems to make a huge difference in the potential for a successful cut.
Direction #1 - No failures in this orientation


Test Media - Colorbok Metallic
Colorbok paper comes in several different metallic surfaces. This is "Shiny Silver" sample delivers mixed results with the eCraft. In this sample, a Pressure setting of 4 seems to deliver the best cut. But, even so, there are obvious flaws. Orientation of the paper seemed to have less effect than the pressure setting.
Here is an image of the best cut I was able to achieve in any orientation.

Smother shapes should be a lot cleaner and on the other end of the spectrum, I didn't even bother to cut the 3" tree since the leaf, which normally is very smooth with heavier card stock was having such mixed results. The metal, like the glitter, might reduce the effect of the paper grain.
So, while it is NOT definitive, based on these limited tests, we might not be far off track if we start paying attention to paper grain as we try different media. Over time we should be able to either confirm or deny this theory as more of us try different media and report our findings.
Test Media: Wool Felt
I was asked, in a comment to try felt. I had actually purchased some to test; but, really haven't had the time to test it well. So, I decided to give it a try. What I;m posting here is my first attempt to cut felt. It is NOT a definitive answer to the question, "Can it cut felt?" It is merely the result of a quick attempt just because people are interested in it. I will do a more exhaustive test later.
The graphic will not do the eCraft's cutting of felt justice. The only test I've done used the Xyron adhesive to stiffen the felt. Other materials might be a lot better. But, I can say this, Yes, the eCraft was able to CUT the felt. But, with the slippery backing it was not able to position it as well as it needs to in order to make a cleanly shaped cut. And, the 'tabs' in felt must be cut with scissors or the felt can stretch and rip.
I ended up having to hold on to the felt and help pull it back out of the machine with slight pressure. A less slippery stiffener would not require that. Here is the first attempt at cutting felt. While not perfect, it is promising and deserves more exhaustive testing.

I had set the tabs to the widest width and I would not do that with felt in future tests. Most of the raggedness of the shape has to do with crude attempts to pull the tabs loose. But, there is some indication of the fact that I needed to help it push the felt out of the machine. Notice the right side, which is PULLING it back in is much smoother.
The Fun Factor!
Most people don't buy a digital die cutter to take the drudgery out of life. They buy one because it adds something TO their life. Let's face it it. They are fun. And, fun is what I was having yesterday with 1 eCraft, 2 granddaughters and a boatload of paper.
The eCraft is designed to be portable. Yes, it is wide. But, it's not very deep with the cover closed and it's not very heavy. So, I bundled mine off for one of our frequent visits to see our granddaughters. The box to carry the papers was far heavier and more bulky than the eCraft itself. And, it traveled quite well on the back seat of my car for the 100 mile trip.
It didn't take me long to have an excellent demonstration in how easy the eCraft is to use for the first time and how much children love the most expensive papers!!! Yikes!
The only SD chip that I have is the basic Fundamentals #1. And, that shape collection includes a single font. So, my oldest granddaughter, 10, picked out a gold glitter paper (American Crafts AC Cardstock 71417 12x12 GL Gold) and proceeded to find the letter 'G", the initial off her first name, select 10" size and pushed cut. The pressure was set to 8 and, to my surprise, it cut through on the frst pass. This particular glitter paper seems very heavy and I fully expected to have to use the multicut feature. But, I did not.
My second granddaughter, 8, then cut out an "E" for her first cut. And, again, the cut was excellent. By the way, this particular glitter paper was purchased at A.C. Moore. I looked for it at Michaels and they do not seem to carry it.
One they saw what the eCraft could do, the real exploring began. And, we tried a variety of glitter papers and foil papers without a single failure. They had the most fun cutting out a variety of leaves. Now, there is one leaf that I had expected might give us trouble because of the long, curling stem. But, it did not.
I'd picked up some DCWV cardstock in the collection called, "The Autumn Splendor" It includes some glitter papers in autumn colors that seem lighter than the American Craft cardstock. With these autumn colors they proceeded to cut out dozens leaves and trees of all sizes... right down to 3". And, again, we did not have a single failure.
The girls had a great time. And, when PopPop's girls have a great time then PopPop has a great time. I can hardly wait to get the computer interface and some more SD cards... in particular the paper doll SD collection. And, YES! It IS for them... well, MOSTLY for them. OK, I'll let them use it; but, it stays here with me!
While I enjoy honing in on the technical capabilities and problems that come with new products. It's just plain nice to do nothing but have fun with this wonderful new addition in our midst. As factors go, the FUN FACTOR is the most important of all. And, in this regard, the eCraft has more than proved itself a winner.
Saturday, August 21, 2010
Bazzill Basic Paper and Recollections Kraft
People have asked me to test various papers and if I am able to find something that sounds like what they mean, I will do it. I THINK I picked up the right paper to test and if I did then those that asked me about them are going to be VERY pleased.
I picked up both packs of paper from Michaels, so if they aren't the ones that you were interested in, please let me know and I'll try again.
BAZZILL BASIC PAPER
The first is Bazzill Basic Paper, core dyed, textured Premium Cardstock. I'm happy to report that this paper cuts perfectly at pressure setting 8. My guess is that I could have gone to 5 or 6; but, I started at 8 with multicut set to 3 and ended up not needing multicut at all. The eCraft makes a perfect cut in one pass. We cut leaves and trees. And, of course, the infamous 3" tree was on the list to try and it passed with flying colors. In fact, we did not have a single failed cut.
KRAFT PAPER
I'm guessing that there are any number of weights of kraft paper. So, I'm less confident that I found the exact one that the person who requested it wanted tested. I found Michaels' Recollections Cardstock Paper Kraft at 65lb/176g/m2. Like the Bazzile, it cut beautifully in the eCraft. And, again, that included the ever popular 3" tree. A variety of shapes were cut and there were no failures.
We also cut some other papers; but, I will have to talk about them in my next entry. I need to go back to the store and find out the manufacturer of the papers we cut today. My granddaughters wouldn't even let me keep the scraps!
I will say this, we cut metalic papers and some very, very heavy glitter paper and did not have a single failure in many, many cuts.
Subscribe to:
Posts (Atom)