One of the things that would be helpful to all of us would be to have a matrix of settings that eCraft owners have found that cleanly cut every size of every shape on the Fundamentals 1 SD card included with the eCraft with the most commonly used papers.
I suggest starting with some average weight cardstock between 50 lb to 110 lb (135 to 300 g/m²). For myself, I have decided to test 65lb/176g/m² since I can find these weights in abundance at relatively low cost. Higher weight papers will add another factor, the number of multicuts. I don't expect to need multicut with this weight.
What we may want to do is to parse out testing of individual shapes. There are a lot more test subjects on the Fundamentals 1 SD card than first meets the eye with ALL the sizes for ALL the shapes are counted. Some shapes will be very easy. The heart, for instance, can be cut at 5" or 1/2" from 65lb/176g/m² at the same setting of:
Density: 0
Pressure: 1
On the other hand, it took a bit more experimentation to find the right setting for Tree #1 at 3". In this case, it took a setting of:
Density: 2
Width: 2
Pressure: 6
Showing posts with label Digital Die Cutter. Show all posts
Showing posts with label Digital Die Cutter. Show all posts
Monday, August 23, 2010

Sunday, August 22, 2010
Hi-Speed Cut at 420 frames per second
Remember that Hi-Speed video camera I listed under the resources that I have available for analysis. Well here is the eCraft cutting in slow motion. While there is no sound, you will be able to determine where that clicking sound comes from and also see it creating a tab.
Have fun!
When shooting video at high speed you need a lot of light and while I have it a good try here, the lighting could have been better for you. I borrowed this particular camera; but, as helpful as it has been these last two days, it's definitely on my wish list!
Have fun!
When shooting video at high speed you need a lot of light and while I have it a good try here, the lighting could have been better for you. I borrowed this particular camera; but, as helpful as it has been these last two days, it's definitely on my wish list!
Paper Grain as a Possible Factor
Test Media: Kraft Paper
Yesterday, as my granddaughters and I had a great time playing with the eCraft, we didn't have a single failure. Not one.
So, today, I went out and picked up some of the paper that I'd used up with my granddaughters. Then. I set up the eCraft, expecting to routinely capture some images of the eCraft successfully cutting the papers with which we'd had so much success yesterday. In the first cut it failed with the same Kraft paper used yesterday. It was totally puzzling and made no sense at all.
The I realized that I have not been paying any attention at all to the grain orientation of the papers as I've been testing them. So, for my next test, I marked the top of the sheets as I pulled them out of the package. I then tried 8 different cuts using two different sheets of paper. Only one of the eight cuts was a failed cut. But, four of the eight cuts did have visible places where a cut piece lifted up and could have caused a failure or did cause a failure as in the case of one.
Interestingly, all four of the perfectly clean cuts were performed with the top of the paper or the bottom of the paper being inserted onto the eCraft. And, all four of the not as clean cuts were performed when the paper was inserted sideways.
This leads me to believe that grain of the paper, itself, is a factor in helping to ensure a clean cut. So, from now on, as I test, I am going to try to remember to put the paper into the machine so that the grain is pointed into and out of the eCraft. It is very easy to determine paper grain. If you get a clean fold then the fold is along the grain. If the fold has small creases along it, then the fold is across the grain.
I'd appreciate it if others might also observe if grain might have a bearing on any failures that you might have. It would seem logical that the lighter the weight of the paper, the more important paper grain might be. We'll just have to see.
Test Media: Core'dinations - Whitewash Collection
Core'dinations card stock is a very unusual paper that seems softer with layers that can be sanded for effect. The eCraft had trouble with this paper; but, in a very identifiable way. As the blade started against the grain, it would fail. Cuts along the grain were cleaner. How clean or how bad seemed to depend on the angle off of the grain direction. It might not be all that evident in this picture; but, as it cut you could see the effect that direction had on the paper itself. I would be surprised if someone finds a way to cut Core'dination highly textured, soft paper in the eCraft.

Test Media: DCWV The Autumn Splender Cardstock Stack
Not a single failure with this wonderful paper when placing the paper into the eCraft WITH the grain. But, turn it sideways and bad things happen. In these next two images, the only difference was the orientation of the paper when being placed into the eCraft. Because of the glitter, it was not as easy to identify the grain. But, the important thing is that like all paper, it does have a grain and changing the orientation of the paper relative to the cutter seems to make a huge difference in the potential for a successful cut.
Direction #1 - No failures in this orientation
 Direction #2 - 90 degree rotation of the paper - no successes.

Test Media - Colorbok Metallic
Colorbok paper comes in several different metallic surfaces. This is "Shiny Silver" sample delivers mixed results with the eCraft. In this sample, a Pressure setting of 4 seems to deliver the best cut. But, even so, there are obvious flaws. Orientation of the paper seemed to have less effect than the pressure setting.
Here is an image of the best cut I was able to achieve in any orientation.

Smother shapes should be a lot cleaner and on the other end of the spectrum, I didn't even bother to cut the 3" tree since the leaf, which normally is very smooth with heavier card stock was having such mixed results. The metal, like the glitter, might reduce the effect of the paper grain.
So, while it is NOT definitive, based on these limited tests, we might not be far off track if we start paying attention to paper grain as we try different media. Over time we should be able to either confirm or deny this theory as more of us try different media and report our findings.
Test Media: Wool Felt
I was asked, in a comment to try felt. I had actually purchased some to test; but, really haven't had the time to test it well. So, I decided to give it a try. What I;m posting here is my first attempt to cut felt. It is NOT a definitive answer to the question, "Can it cut felt?" It is merely the result of a quick attempt just because people are interested in it. I will do a more exhaustive test later.
The graphic will not do the eCraft's cutting of felt justice. The only test I've done used the Xyron adhesive to stiffen the felt. Other materials might be a lot better. But, I can say this, Yes, the eCraft was able to CUT the felt. But, with the slippery backing it was not able to position it as well as it needs to in order to make a cleanly shaped cut. And, the 'tabs' in felt must be cut with scissors or the felt can stretch and rip.
I ended up having to hold on to the felt and help pull it back out of the machine with slight pressure. A less slippery stiffener would not require that. Here is the first attempt at cutting felt. While not perfect, it is promising and deserves more exhaustive testing.

I had set the tabs to the widest width and I would not do that with felt in future tests. Most of the raggedness of the shape has to do with crude attempts to pull the tabs loose. But, there is some indication of the fact that I needed to help it push the felt out of the machine. Notice the right side, which is PULLING it back in is much smoother.
Yesterday, as my granddaughters and I had a great time playing with the eCraft, we didn't have a single failure. Not one.
So, today, I went out and picked up some of the paper that I'd used up with my granddaughters. Then. I set up the eCraft, expecting to routinely capture some images of the eCraft successfully cutting the papers with which we'd had so much success yesterday. In the first cut it failed with the same Kraft paper used yesterday. It was totally puzzling and made no sense at all.
The I realized that I have not been paying any attention at all to the grain orientation of the papers as I've been testing them. So, for my next test, I marked the top of the sheets as I pulled them out of the package. I then tried 8 different cuts using two different sheets of paper. Only one of the eight cuts was a failed cut. But, four of the eight cuts did have visible places where a cut piece lifted up and could have caused a failure or did cause a failure as in the case of one.
Interestingly, all four of the perfectly clean cuts were performed with the top of the paper or the bottom of the paper being inserted onto the eCraft. And, all four of the not as clean cuts were performed when the paper was inserted sideways.
This leads me to believe that grain of the paper, itself, is a factor in helping to ensure a clean cut. So, from now on, as I test, I am going to try to remember to put the paper into the machine so that the grain is pointed into and out of the eCraft. It is very easy to determine paper grain. If you get a clean fold then the fold is along the grain. If the fold has small creases along it, then the fold is across the grain.
I'd appreciate it if others might also observe if grain might have a bearing on any failures that you might have. It would seem logical that the lighter the weight of the paper, the more important paper grain might be. We'll just have to see.
Test Media: Core'dinations - Whitewash Collection
Core'dinations card stock is a very unusual paper that seems softer with layers that can be sanded for effect. The eCraft had trouble with this paper; but, in a very identifiable way. As the blade started against the grain, it would fail. Cuts along the grain were cleaner. How clean or how bad seemed to depend on the angle off of the grain direction. It might not be all that evident in this picture; but, as it cut you could see the effect that direction had on the paper itself. I would be surprised if someone finds a way to cut Core'dination highly textured, soft paper in the eCraft.
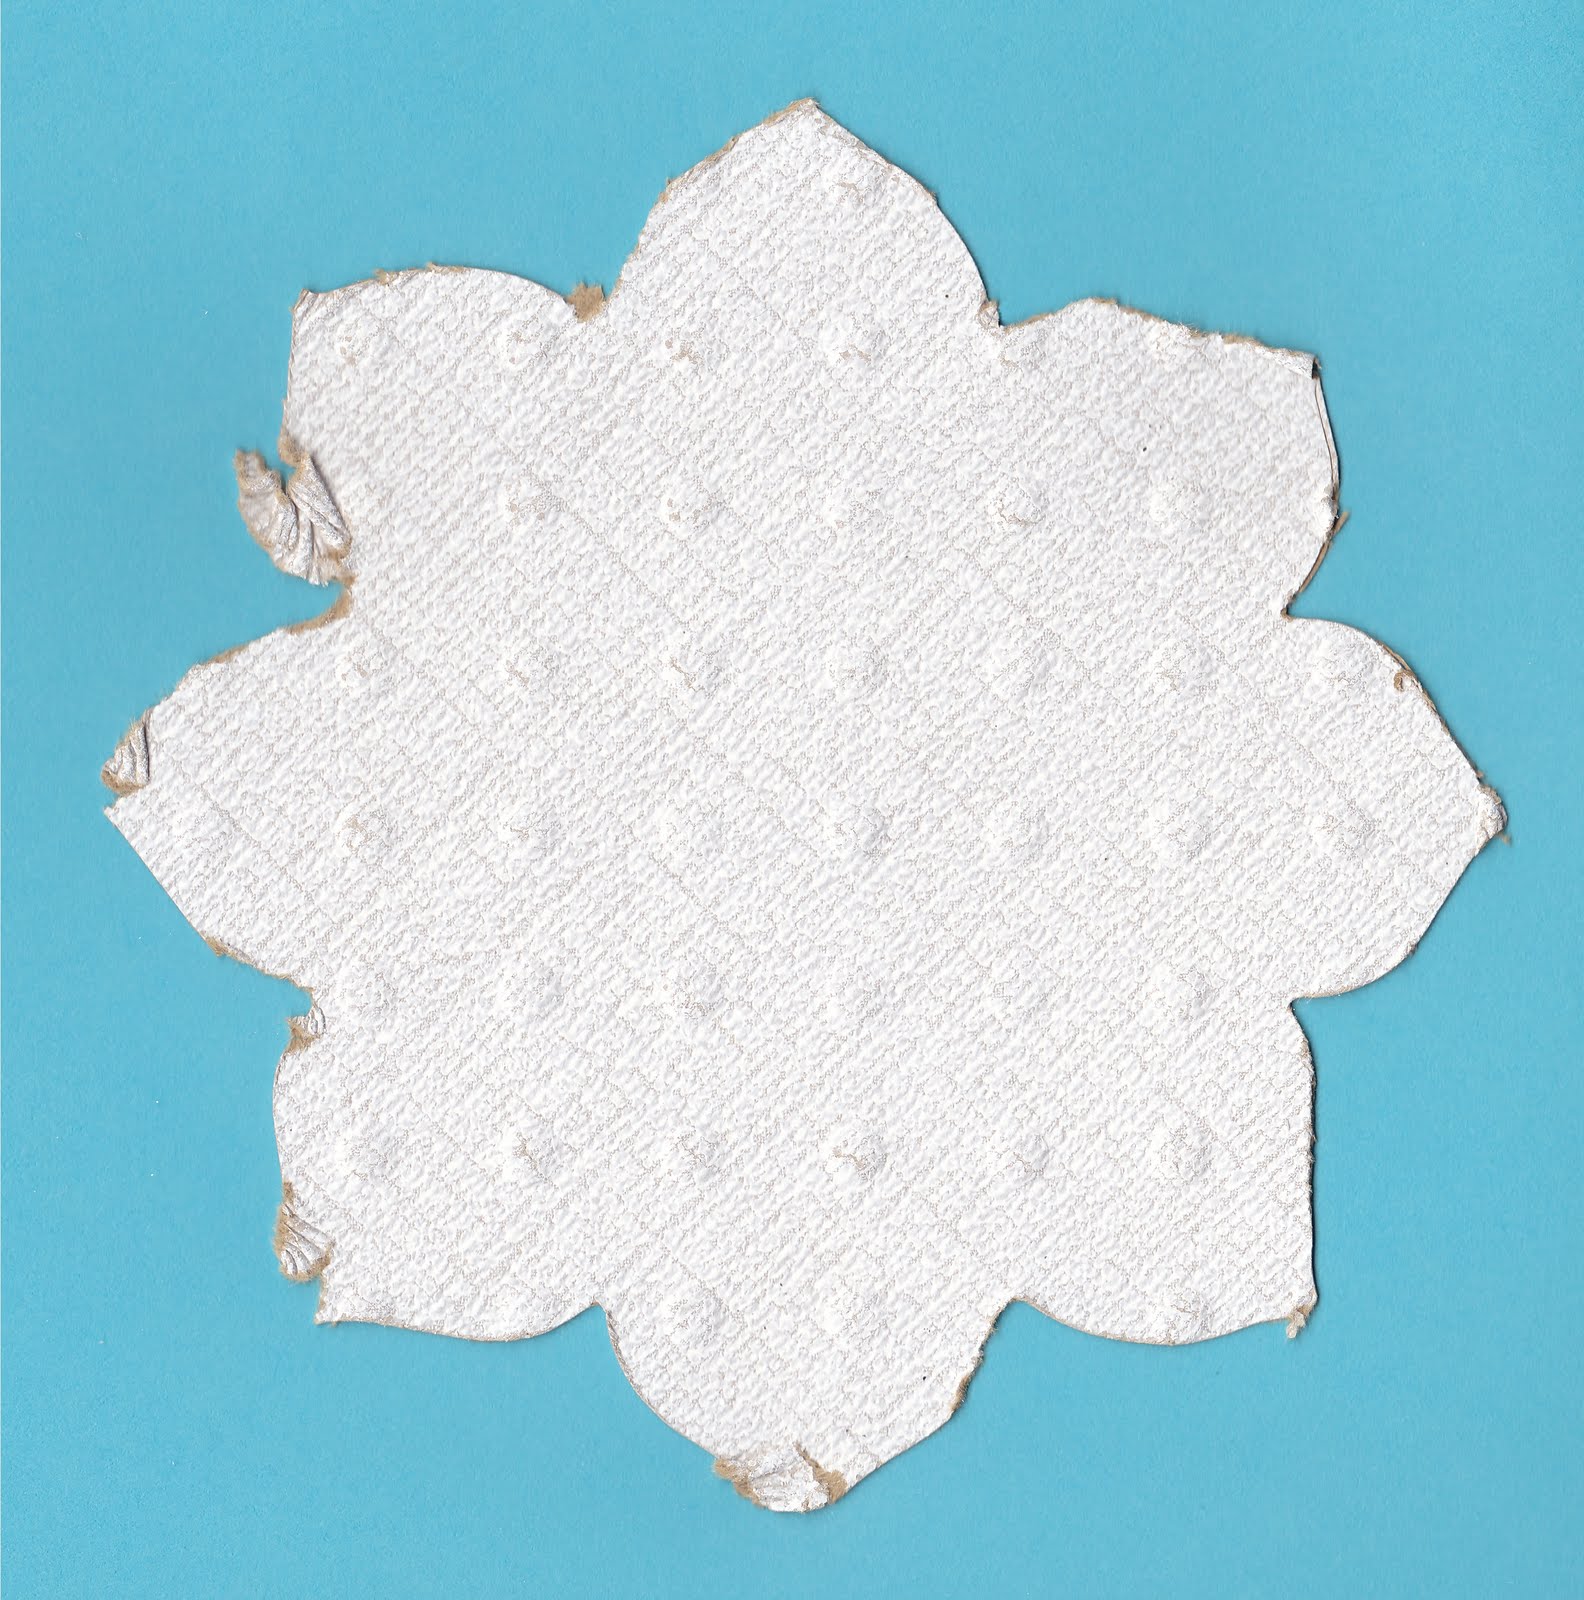
Test Media: DCWV The Autumn Splender Cardstock Stack
Not a single failure with this wonderful paper when placing the paper into the eCraft WITH the grain. But, turn it sideways and bad things happen. In these next two images, the only difference was the orientation of the paper when being placed into the eCraft. Because of the glitter, it was not as easy to identify the grain. But, the important thing is that like all paper, it does have a grain and changing the orientation of the paper relative to the cutter seems to make a huge difference in the potential for a successful cut.
Direction #1 - No failures in this orientation


Test Media - Colorbok Metallic
Colorbok paper comes in several different metallic surfaces. This is "Shiny Silver" sample delivers mixed results with the eCraft. In this sample, a Pressure setting of 4 seems to deliver the best cut. But, even so, there are obvious flaws. Orientation of the paper seemed to have less effect than the pressure setting.
Here is an image of the best cut I was able to achieve in any orientation.

Smother shapes should be a lot cleaner and on the other end of the spectrum, I didn't even bother to cut the 3" tree since the leaf, which normally is very smooth with heavier card stock was having such mixed results. The metal, like the glitter, might reduce the effect of the paper grain.
So, while it is NOT definitive, based on these limited tests, we might not be far off track if we start paying attention to paper grain as we try different media. Over time we should be able to either confirm or deny this theory as more of us try different media and report our findings.
Test Media: Wool Felt
I was asked, in a comment to try felt. I had actually purchased some to test; but, really haven't had the time to test it well. So, I decided to give it a try. What I;m posting here is my first attempt to cut felt. It is NOT a definitive answer to the question, "Can it cut felt?" It is merely the result of a quick attempt just because people are interested in it. I will do a more exhaustive test later.
The graphic will not do the eCraft's cutting of felt justice. The only test I've done used the Xyron adhesive to stiffen the felt. Other materials might be a lot better. But, I can say this, Yes, the eCraft was able to CUT the felt. But, with the slippery backing it was not able to position it as well as it needs to in order to make a cleanly shaped cut. And, the 'tabs' in felt must be cut with scissors or the felt can stretch and rip.
I ended up having to hold on to the felt and help pull it back out of the machine with slight pressure. A less slippery stiffener would not require that. Here is the first attempt at cutting felt. While not perfect, it is promising and deserves more exhaustive testing.

I had set the tabs to the widest width and I would not do that with felt in future tests. Most of the raggedness of the shape has to do with crude attempts to pull the tabs loose. But, there is some indication of the fact that I needed to help it push the felt out of the machine. Notice the right side, which is PULLING it back in is much smoother.
The Fun Factor!
Most people don't buy a digital die cutter to take the drudgery out of life. They buy one because it adds something TO their life. Let's face it it. They are fun. And, fun is what I was having yesterday with 1 eCraft, 2 granddaughters and a boatload of paper.
The eCraft is designed to be portable. Yes, it is wide. But, it's not very deep with the cover closed and it's not very heavy. So, I bundled mine off for one of our frequent visits to see our granddaughters. The box to carry the papers was far heavier and more bulky than the eCraft itself. And, it traveled quite well on the back seat of my car for the 100 mile trip.
It didn't take me long to have an excellent demonstration in how easy the eCraft is to use for the first time and how much children love the most expensive papers!!! Yikes!
The only SD chip that I have is the basic Fundamentals #1. And, that shape collection includes a single font. So, my oldest granddaughter, 10, picked out a gold glitter paper (American Crafts AC Cardstock 71417 12x12 GL Gold) and proceeded to find the letter 'G", the initial off her first name, select 10" size and pushed cut. The pressure was set to 8 and, to my surprise, it cut through on the frst pass. This particular glitter paper seems very heavy and I fully expected to have to use the multicut feature. But, I did not.
My second granddaughter, 8, then cut out an "E" for her first cut. And, again, the cut was excellent. By the way, this particular glitter paper was purchased at A.C. Moore. I looked for it at Michaels and they do not seem to carry it.
One they saw what the eCraft could do, the real exploring began. And, we tried a variety of glitter papers and foil papers without a single failure. They had the most fun cutting out a variety of leaves. Now, there is one leaf that I had expected might give us trouble because of the long, curling stem. But, it did not.
I'd picked up some DCWV cardstock in the collection called, "The Autumn Splendor" It includes some glitter papers in autumn colors that seem lighter than the American Craft cardstock. With these autumn colors they proceeded to cut out dozens leaves and trees of all sizes... right down to 3". And, again, we did not have a single failure.
The girls had a great time. And, when PopPop's girls have a great time then PopPop has a great time. I can hardly wait to get the computer interface and some more SD cards... in particular the paper doll SD collection. And, YES! It IS for them... well, MOSTLY for them. OK, I'll let them use it; but, it stays here with me!
While I enjoy honing in on the technical capabilities and problems that come with new products. It's just plain nice to do nothing but have fun with this wonderful new addition in our midst. As factors go, the FUN FACTOR is the most important of all. And, in this regard, the eCraft has more than proved itself a winner.
The eCraft is designed to be portable. Yes, it is wide. But, it's not very deep with the cover closed and it's not very heavy. So, I bundled mine off for one of our frequent visits to see our granddaughters. The box to carry the papers was far heavier and more bulky than the eCraft itself. And, it traveled quite well on the back seat of my car for the 100 mile trip.
It didn't take me long to have an excellent demonstration in how easy the eCraft is to use for the first time and how much children love the most expensive papers!!! Yikes!
The only SD chip that I have is the basic Fundamentals #1. And, that shape collection includes a single font. So, my oldest granddaughter, 10, picked out a gold glitter paper (American Crafts AC Cardstock 71417 12x12 GL Gold) and proceeded to find the letter 'G", the initial off her first name, select 10" size and pushed cut. The pressure was set to 8 and, to my surprise, it cut through on the frst pass. This particular glitter paper seems very heavy and I fully expected to have to use the multicut feature. But, I did not.
My second granddaughter, 8, then cut out an "E" for her first cut. And, again, the cut was excellent. By the way, this particular glitter paper was purchased at A.C. Moore. I looked for it at Michaels and they do not seem to carry it.
One they saw what the eCraft could do, the real exploring began. And, we tried a variety of glitter papers and foil papers without a single failure. They had the most fun cutting out a variety of leaves. Now, there is one leaf that I had expected might give us trouble because of the long, curling stem. But, it did not.
I'd picked up some DCWV cardstock in the collection called, "The Autumn Splendor" It includes some glitter papers in autumn colors that seem lighter than the American Craft cardstock. With these autumn colors they proceeded to cut out dozens leaves and trees of all sizes... right down to 3". And, again, we did not have a single failure.
The girls had a great time. And, when PopPop's girls have a great time then PopPop has a great time. I can hardly wait to get the computer interface and some more SD cards... in particular the paper doll SD collection. And, YES! It IS for them... well, MOSTLY for them. OK, I'll let them use it; but, it stays here with me!
While I enjoy honing in on the technical capabilities and problems that come with new products. It's just plain nice to do nothing but have fun with this wonderful new addition in our midst. As factors go, the FUN FACTOR is the most important of all. And, in this regard, the eCraft has more than proved itself a winner.
Saturday, August 21, 2010
Bazzill Basic Paper and Recollections Kraft
People have asked me to test various papers and if I am able to find something that sounds like what they mean, I will do it. I THINK I picked up the right paper to test and if I did then those that asked me about them are going to be VERY pleased.
I picked up both packs of paper from Michaels, so if they aren't the ones that you were interested in, please let me know and I'll try again.
BAZZILL BASIC PAPER
The first is Bazzill Basic Paper, core dyed, textured Premium Cardstock. I'm happy to report that this paper cuts perfectly at pressure setting 8. My guess is that I could have gone to 5 or 6; but, I started at 8 with multicut set to 3 and ended up not needing multicut at all. The eCraft makes a perfect cut in one pass. We cut leaves and trees. And, of course, the infamous 3" tree was on the list to try and it passed with flying colors. In fact, we did not have a single failed cut.
KRAFT PAPER
I'm guessing that there are any number of weights of kraft paper. So, I'm less confident that I found the exact one that the person who requested it wanted tested. I found Michaels' Recollections Cardstock Paper Kraft at 65lb/176g/m2. Like the Bazzile, it cut beautifully in the eCraft. And, again, that included the ever popular 3" tree. A variety of shapes were cut and there were no failures.
We also cut some other papers; but, I will have to talk about them in my next entry. I need to go back to the store and find out the manufacturer of the papers we cut today. My granddaughters wouldn't even let me keep the scraps!
I will say this, we cut metalic papers and some very, very heavy glitter paper and did not have a single failure in many, many cuts.
I picked up both packs of paper from Michaels, so if they aren't the ones that you were interested in, please let me know and I'll try again.
BAZZILL BASIC PAPER
The first is Bazzill Basic Paper, core dyed, textured Premium Cardstock. I'm happy to report that this paper cuts perfectly at pressure setting 8. My guess is that I could have gone to 5 or 6; but, I started at 8 with multicut set to 3 and ended up not needing multicut at all. The eCraft makes a perfect cut in one pass. We cut leaves and trees. And, of course, the infamous 3" tree was on the list to try and it passed with flying colors. In fact, we did not have a single failed cut.
KRAFT PAPER
I'm guessing that there are any number of weights of kraft paper. So, I'm less confident that I found the exact one that the person who requested it wanted tested. I found Michaels' Recollections Cardstock Paper Kraft at 65lb/176g/m2. Like the Bazzile, it cut beautifully in the eCraft. And, again, that included the ever popular 3" tree. A variety of shapes were cut and there were no failures.
We also cut some other papers; but, I will have to talk about them in my next entry. I need to go back to the store and find out the manufacturer of the papers we cut today. My granddaughters wouldn't even let me keep the scraps!
I will say this, we cut metalic papers and some very, very heavy glitter paper and did not have a single failure in many, many cuts.
Friday, August 20, 2010
The tools at my disposal
Probably no new tool has faced such instant scrutiny as the eCraft. First, people have been using traditional cutters with mats for years and they had a dream in their minds what a matless cutter would do for them. And, that is perfectly legitimate.
Secondly, the eCraft came along just as I decided to seriously look at cutting machines and create a blog to communicate what I was finding. That wouldn't be too bad except that I don't know anything at all about paper crafting from an artistic sense, so I had to focus on other things, like technology.
I like the eCraft technology. And, I like it a lot. It seems to me that the fundamentals are all there to be THE great cutting machine among many great cutting machines. And, I say that probably having tested it harder and spotting more flaws in the greatest detail of any other user... except, perhaps their competitors.
I see a danger in what I am doing in that I have the tools to look too hard, too soon in a way that is not fair to eCraft. I've never looked at a Cricut with these tools. And, I have never even looked at my Gazelle with these tools. I didn't have to. What I saw on the surface of those two machines was enough for me not to want to spend the time looking further. And, it is not that they are not good machines. It is just that the technology of the eCraft is that much more promising.
What are the tools at my disposal? First, I have about a half dozen microscopes of various types with which to examine blades and cuts. And, I am using some of them to analyze things that puzzle me. My primary scope is a 10x-40 zoom stereoscope.
 How many other digital die cutters have been examined using a stereo microscope? Probably not many.
Then there is the video equipment I have at my disposal. The range of types of video that I'm using in my analysis of the eCraft includes Hi-Def and Hi-Speed. Again, what other machine underwent that kind of scutiny the very first week it was released. Here, for instance, is the Casio EX-FH20 high speed digital camera that I have been using this evening to analyze cuts in very light paper.
 It's capable of capturing 1000 frames per second. But, I'll mostly be using it at 210 frames per second and 420 fps. I certainly didn't feel the need to use this camera on the Gazelle. Why? Because the Gazelle is not the cutter I see in my daughter's future. The eCraft is the cutter I see in her future and I want it to work absolutely perfectly with all papers. And, if I spot that it does not, I want to know why so that it can be corrected.
Ok, so the eCraft has undergone scrutiny under the microscope, hi -def video and hi-speed video. But, there is a lower tech tool that I'm using to communicate what I see to you and to eCraft. And, that is the lowly scanner. That's how I've been able to show you nature of the tabs and quality of the cuts. But, it's also how I have analyzed repeatable failures like the cops comparing bullets from a weapon.
 It's how I was able to prove that I finally found a way to cut fun foam.
And, finally, there is a 21mpx digital camera with images of the eCraft that can be blown up to 40" x 60" with no loss of detail. Search the web for where anyone has subjected any other cutter to this kind of scrutiny.

So, why am I saying this?
It is so that you understand that my intentions are to do everything I can to make your life with the eCraft a positive experience and to help eCraft end up with a machine that can withstand this kind of scrutiny and shine like a beacon. I don't want people to take what I find and run in a negative direction with it. That is not my intention.
I've said it before and I'll say it again. I've taken delivery on one and have paid for a second. I could bail on the second and would bail on the second if I didn't think the eCraft is built on a solid technical foundation. But, I am NOT. In fact, I still plan on buying a third eCraft for my second daughter and her family. I could give her the Gazelle. But, frankly, I don't think the Gazelle is the right product for my daughters. The eCraft is the right product for my daughters.
There is a sequal to a quaint little movie about Nanny McPhee. In this series, when Nanny McPhee first shows up she is VERY ugly with crooked teeth and scary warts. But, as the children learn new lessons, Nanny McPhee loses a wart here or a blemish there and by the end of the film she is charmingly beautiful and sweet looking. This, I believe has some interesting parallels with the topic at hand.
We are going to see some warts. And, some of those warts are going to be pretty glaring. But, as we (and Craftwell) learn, the warts ARE going to go away and we will be left with something altogether beautiful because we didn't turn away at the sight of the warts. We did what we could to remove them.
So, for the rest of the weekend, my time with the eCraft will be divided into too very different activities. The first, is to stress the machine under the critical eye of hi-speed video capture. And, the second is to have some wonderful fun with my granchildren just cutting out shapes and creating cool projects without even thinking about testing or evaluating. That is my REAL idea of fun.
Secondly, the eCraft came along just as I decided to seriously look at cutting machines and create a blog to communicate what I was finding. That wouldn't be too bad except that I don't know anything at all about paper crafting from an artistic sense, so I had to focus on other things, like technology.
I like the eCraft technology. And, I like it a lot. It seems to me that the fundamentals are all there to be THE great cutting machine among many great cutting machines. And, I say that probably having tested it harder and spotting more flaws in the greatest detail of any other user... except, perhaps their competitors.
I see a danger in what I am doing in that I have the tools to look too hard, too soon in a way that is not fair to eCraft. I've never looked at a Cricut with these tools. And, I have never even looked at my Gazelle with these tools. I didn't have to. What I saw on the surface of those two machines was enough for me not to want to spend the time looking further. And, it is not that they are not good machines. It is just that the technology of the eCraft is that much more promising.
What are the tools at my disposal? First, I have about a half dozen microscopes of various types with which to examine blades and cuts. And, I am using some of them to analyze things that puzzle me. My primary scope is a 10x-40 zoom stereoscope.

Then there is the video equipment I have at my disposal. The range of types of video that I'm using in my analysis of the eCraft includes Hi-Def and Hi-Speed. Again, what other machine underwent that kind of scutiny the very first week it was released. Here, for instance, is the Casio EX-FH20 high speed digital camera that I have been using this evening to analyze cuts in very light paper.

Ok, so the eCraft has undergone scrutiny under the microscope, hi -def video and hi-speed video. But, there is a lower tech tool that I'm using to communicate what I see to you and to eCraft. And, that is the lowly scanner. That's how I've been able to show you nature of the tabs and quality of the cuts. But, it's also how I have analyzed repeatable failures like the cops comparing bullets from a weapon.

And, finally, there is a 21mpx digital camera with images of the eCraft that can be blown up to 40" x 60" with no loss of detail. Search the web for where anyone has subjected any other cutter to this kind of scrutiny.

So, why am I saying this?
It is so that you understand that my intentions are to do everything I can to make your life with the eCraft a positive experience and to help eCraft end up with a machine that can withstand this kind of scrutiny and shine like a beacon. I don't want people to take what I find and run in a negative direction with it. That is not my intention.
I've said it before and I'll say it again. I've taken delivery on one and have paid for a second. I could bail on the second and would bail on the second if I didn't think the eCraft is built on a solid technical foundation. But, I am NOT. In fact, I still plan on buying a third eCraft for my second daughter and her family. I could give her the Gazelle. But, frankly, I don't think the Gazelle is the right product for my daughters. The eCraft is the right product for my daughters.
There is a sequal to a quaint little movie about Nanny McPhee. In this series, when Nanny McPhee first shows up she is VERY ugly with crooked teeth and scary warts. But, as the children learn new lessons, Nanny McPhee loses a wart here or a blemish there and by the end of the film she is charmingly beautiful and sweet looking. This, I believe has some interesting parallels with the topic at hand.
We are going to see some warts. And, some of those warts are going to be pretty glaring. But, as we (and Craftwell) learn, the warts ARE going to go away and we will be left with something altogether beautiful because we didn't turn away at the sight of the warts. We did what we could to remove them.
So, for the rest of the weekend, my time with the eCraft will be divided into too very different activities. The first, is to stress the machine under the critical eye of hi-speed video capture. And, the second is to have some wonderful fun with my granchildren just cutting out shapes and creating cool projects without even thinking about testing or evaluating. That is my REAL idea of fun.
Thursday, August 19, 2010
To Tab or Not to Tab
eCraft came up with a novel solution to the fact that they wanted to create digital die cuts without the obligatory mat used with all other digital die cutting machines. They call their solution "TABS." But, already the craft community has relabeled them 'Chads."
Whatever the word used to describe them they are very important to the cutting strategy of the eCraft machine. They hold the cut piece in place while more of the shape is being cut.
Perhaps knowing that tabs might be off-putting to some, the eCraft designers gave us control of the tabs in two ways. First, we can control the DENSITY of the tabs (how closely they are created) and how WIDE each tab might be. Tab density can be set from 0 to 2 and tab width can be set from 1 to 3.
When a density of 0 is selected, then the shape will be cut with no tabs at all. So, yes, it is possible to cut a shape without a single tab. But, there are practical limitations. In order for a cut to be successful without using any tabs, there are some criteria that my experiments show must be met.
First, the thicker card stocks work best. I've had success with the DCWV Textured Mat Stack paper from Michaels.
Secondly, the path of the cut must not reverse direction and back into the piece. This means that the Tree Shape, with its small limbs would NOT be a good candidate for cutting without tabs. We want MORE and BIGGER tabs for something like the tree.
Thirdly, a new blade is going to create less drag on the cut piece. So, the newer the blade, the better.
Here is a very successful cut using no tabs at all. It was cut from a sheet of 5" x 7" DCWV Mat Stack Brights (Textured). I scanned this shape in at 1200 x 1200 to permit you to really check out the cut. This shape is just 2" in size.

Let's analyze why this shape did not need tabs to be cut successfully. First, the order of the cuts is an important factor. Each of the 4 empty areas were cut out first. And, at the critical areas where the blade drastically changed direction there was still a large uncut connection still holding the segment in place. There are two small cutouts and two large cutouts with relatively continuous paths. The piece itself was not cut free from the base paper until the inside areas where completely finished.
Had the paths been designed so that the outside was cut first, we could not have been able to cut this shape without tabs. We need to remember that when we get the software to design our own shapes. Cut order is critically important.
The next piece might look a lot more complex; but, in reality it is not.
 Yes, it has many more internal cutouts. But, in every case, due to the design and order of the paths, there is still a large area of connection when the blade changes direction, to most critical time of cut failure. And, once again, while this appears to be many circles, to the cutter it is really just a scalloped outline when making the final cut. We might even be able to see where that final breakthrough, completely releasing the piece, was made.
It should be obvious why this last chadless example worked. So much of the piece was held into place by the uncut area until the very last cut. And, being 5", with the final cut near the base, both the piece and the base paper were in the grip of the primary rollers when the final cut was made. So, WHERE the path for the shape starts is also an important factor. Had the start been at the TOP of the piece, the cut might have been only 90% or so successful, since the rest of the piece would have been flopping around as it neared the final cut.
 So, it seems to me that we should be able to predict which shapes can or cannot be cut with a DENSITY of 0. Look for those shapes where the entire base page is the tab until the last cut.
Whatever the word used to describe them they are very important to the cutting strategy of the eCraft machine. They hold the cut piece in place while more of the shape is being cut.
Perhaps knowing that tabs might be off-putting to some, the eCraft designers gave us control of the tabs in two ways. First, we can control the DENSITY of the tabs (how closely they are created) and how WIDE each tab might be. Tab density can be set from 0 to 2 and tab width can be set from 1 to 3.
When a density of 0 is selected, then the shape will be cut with no tabs at all. So, yes, it is possible to cut a shape without a single tab. But, there are practical limitations. In order for a cut to be successful without using any tabs, there are some criteria that my experiments show must be met.
First, the thicker card stocks work best. I've had success with the DCWV Textured Mat Stack paper from Michaels.
Secondly, the path of the cut must not reverse direction and back into the piece. This means that the Tree Shape, with its small limbs would NOT be a good candidate for cutting without tabs. We want MORE and BIGGER tabs for something like the tree.
Thirdly, a new blade is going to create less drag on the cut piece. So, the newer the blade, the better.
Here is a very successful cut using no tabs at all. It was cut from a sheet of 5" x 7" DCWV Mat Stack Brights (Textured). I scanned this shape in at 1200 x 1200 to permit you to really check out the cut. This shape is just 2" in size.

Let's analyze why this shape did not need tabs to be cut successfully. First, the order of the cuts is an important factor. Each of the 4 empty areas were cut out first. And, at the critical areas where the blade drastically changed direction there was still a large uncut connection still holding the segment in place. There are two small cutouts and two large cutouts with relatively continuous paths. The piece itself was not cut free from the base paper until the inside areas where completely finished.
Had the paths been designed so that the outside was cut first, we could not have been able to cut this shape without tabs. We need to remember that when we get the software to design our own shapes. Cut order is critically important.
The next piece might look a lot more complex; but, in reality it is not.

It should be obvious why this last chadless example worked. So much of the piece was held into place by the uncut area until the very last cut. And, being 5", with the final cut near the base, both the piece and the base paper were in the grip of the primary rollers when the final cut was made. So, WHERE the path for the shape starts is also an important factor. Had the start been at the TOP of the piece, the cut might have been only 90% or so successful, since the rest of the piece would have been flopping around as it neared the final cut.

Wednesday, August 18, 2010
Three Inch Tree - The Ultimate Test?
Of all the objects with which we have to test the eCraft until the software arrives, I believe the first Tree in the Nature Collection on the Fundamentals #1 SD chip provides the greatest test.
Angie G, an Australian eCraft owner, was the person that brought the tree to my attention. I am SO glad that she did. It provides the perfect test for just about any paper.
Now, remember, we're going for the jugular when we try to print out this tree at the smallest size. This is NOT indicative of most of the shapes you will want to cut in every day life. We're being mean to the eCraft in order to test paper and settings. But, since I think MOST of us try to see the limits of our equipment when we first get it, it's probably best to push the envelope beyond reality.
The reason why the tree is so brutal a test is that it makes turns the blade in directions that stress the paper in every direction with very delicate cuts having tight corners. Let's examine the Tree along with the stresses that make this shape among the toughest.

Remember, to cut, the Trolley slides back and forth on the "X" axis, putting lateral stresses on the blade and paper. And, at the same time, the main rollers Push or Pull to position the paper precisely for the cut on the "Y" axis putting two different types of Vertical stress on the blade and paper.
For the tree, the cut starts at A and is PUSHED toward us with very little lateral stress. As it moves toward B lateral stress increases and since there is a tight turn the lateral stresses suddenly reverse direction. Just after B, at the top of the small branch the vertical direction changes abruptly but the lateral stress lets up a bit. Frankly, it is here that I would expect the papers to fail. But, it does not. Generally, all of the papers move through C and D without much trouble. The point of failure is almost always at E. This was very surprising to me because my inclination had been to see failure in terms of the carrier paper. But, in fact, the failure seems to be due not to stress on the carrier paper; but, to stress on the previously cut shape.
What happens, I believe, at E is that the carrier paper reverses direction and begins to be PULLED back into the machine at the very same time that a small lateral turn is being made. Pulling is less forgiving than PUSHING since the carrier paper can flex a little bit to take up the stress when being pushed. But, the carrier paper is pulled very tight when being pulled. This, I believe, probably forces the blade tip against the CUT piece which, in lighter/softer paper, probably breaks the tab holding it and bunches up that little piece of cut paper.
If this is true, then stiff paper should behave better than thinner paper. And, that is exactly what seems to happen. There is one other factor that seems to hold true. A new blade tip comes to a very small, sharp point. With use, the tip is worn down a bit and flattens. A flattened tip, I believe cannot make the turns as cleanly as a new, highly pointed tip. So, I try to use a completely new or nearly new blade when testing intricately small cuts. Make buying extra blades a top priority.
Here are some videos of results.
110lb Staples 8.5x11 Cardstock
Hammermill 67lb cardstock (Staples)
DCWV Glitter MatStack (Michaels)
Recollections - South Beach (Michaels)
Craft Paper (Michaels) - Failed
DCWV Mat Stack Brights (Michaels)
We don't have a video of Mat Stack Brights. But, here is proof that it cut very well. On the left is the paper from which it was cut and on the right is the cut shape.

Lastly, I want to show the difference between a new blade and a used blade. Just as an ice dancer needs to stand on the tips of their skates to spin, the eCraft needs a sharp pointed blade to properly make tight turns.
Blades life depends on at lease two factors, the materials being cut and probably the frequency of the tabs, since the blade hits the cutting plate each time a tab is created. Here, at 10x, are three different blade conditions. The blades are magnetized, so I use a reversed blade to keep them together and not fly away from each other which is why one of the blades is showing us the end opposite of the cutting surface.

Here we have a new blade under a 20 power scope taken with a video scope camera.

Compare that to this used blade.

As you can see, there is a huge difference between a new blade and one that has cut glitter paper or other hard materials. The latter is NOT going to do well with small, intricate cuts.
While I had the microscope out, I thought I would demonstrate the tabs that hold pieces in place. A lot of people are concerned that they would be annoyingly large. To me they are not. As a matter of fact, it is possible to not have any tabs. But, here are a couple of Tree Limb samples of a setting of density 2 / width 1 at 20x.


And, here is a different shape with density 1 / width 1 and a second with density 2 / width 3 at 20x.


As you can see, the tabs are barely wider than the blade. The second image is the widest setting for tabs. So, we aren't talking about huge connectors that would ruin a piece. I hope this is helpful information.
If you want to thank someone for the information in this post, please thank Angie! Nice Find!
Angie G, an Australian eCraft owner, was the person that brought the tree to my attention. I am SO glad that she did. It provides the perfect test for just about any paper.
Now, remember, we're going for the jugular when we try to print out this tree at the smallest size. This is NOT indicative of most of the shapes you will want to cut in every day life. We're being mean to the eCraft in order to test paper and settings. But, since I think MOST of us try to see the limits of our equipment when we first get it, it's probably best to push the envelope beyond reality.
The reason why the tree is so brutal a test is that it makes turns the blade in directions that stress the paper in every direction with very delicate cuts having tight corners. Let's examine the Tree along with the stresses that make this shape among the toughest.

Remember, to cut, the Trolley slides back and forth on the "X" axis, putting lateral stresses on the blade and paper. And, at the same time, the main rollers Push or Pull to position the paper precisely for the cut on the "Y" axis putting two different types of Vertical stress on the blade and paper.
For the tree, the cut starts at A and is PUSHED toward us with very little lateral stress. As it moves toward B lateral stress increases and since there is a tight turn the lateral stresses suddenly reverse direction. Just after B, at the top of the small branch the vertical direction changes abruptly but the lateral stress lets up a bit. Frankly, it is here that I would expect the papers to fail. But, it does not. Generally, all of the papers move through C and D without much trouble. The point of failure is almost always at E. This was very surprising to me because my inclination had been to see failure in terms of the carrier paper. But, in fact, the failure seems to be due not to stress on the carrier paper; but, to stress on the previously cut shape.
What happens, I believe, at E is that the carrier paper reverses direction and begins to be PULLED back into the machine at the very same time that a small lateral turn is being made. Pulling is less forgiving than PUSHING since the carrier paper can flex a little bit to take up the stress when being pushed. But, the carrier paper is pulled very tight when being pulled. This, I believe, probably forces the blade tip against the CUT piece which, in lighter/softer paper, probably breaks the tab holding it and bunches up that little piece of cut paper.
If this is true, then stiff paper should behave better than thinner paper. And, that is exactly what seems to happen. There is one other factor that seems to hold true. A new blade tip comes to a very small, sharp point. With use, the tip is worn down a bit and flattens. A flattened tip, I believe cannot make the turns as cleanly as a new, highly pointed tip. So, I try to use a completely new or nearly new blade when testing intricately small cuts. Make buying extra blades a top priority.
Here are some videos of results.
110lb Staples 8.5x11 Cardstock
Hammermill 67lb cardstock (Staples)
DCWV Glitter MatStack (Michaels)
Recollections - South Beach (Michaels)
Craft Paper (Michaels) - Failed
DCWV Mat Stack Brights (Michaels)
We don't have a video of Mat Stack Brights. But, here is proof that it cut very well. On the left is the paper from which it was cut and on the right is the cut shape.

Lastly, I want to show the difference between a new blade and a used blade. Just as an ice dancer needs to stand on the tips of their skates to spin, the eCraft needs a sharp pointed blade to properly make tight turns.
Blades life depends on at lease two factors, the materials being cut and probably the frequency of the tabs, since the blade hits the cutting plate each time a tab is created. Here, at 10x, are three different blade conditions. The blades are magnetized, so I use a reversed blade to keep them together and not fly away from each other which is why one of the blades is showing us the end opposite of the cutting surface.

Here we have a new blade under a 20 power scope taken with a video scope camera.

Compare that to this used blade.

As you can see, there is a huge difference between a new blade and one that has cut glitter paper or other hard materials. The latter is NOT going to do well with small, intricate cuts.
While I had the microscope out, I thought I would demonstrate the tabs that hold pieces in place. A lot of people are concerned that they would be annoyingly large. To me they are not. As a matter of fact, it is possible to not have any tabs. But, here are a couple of Tree Limb samples of a setting of density 2 / width 1 at 20x.


And, here is a different shape with density 1 / width 1 and a second with density 2 / width 3 at 20x.


As you can see, the tabs are barely wider than the blade. The second image is the widest setting for tabs. So, we aren't talking about huge connectors that would ruin a piece. I hope this is helpful information.
If you want to thank someone for the information in this post, please thank Angie! Nice Find!
Paper Appears to be a Critical Factor and it's Puzzling
As I have stated before. I have never used a Cricut nor most other cutters. My only experience at all is what little I attempted with the Gazelle. So, I don't really know how different papers behaved under the cutting blades of other digital die cutters.
But, I am learning this. Different papers and materials do have a critical bearing on the success or failure of intricate cuts with the eCraft. It's hard to know exactly why. But, I'm determined to find out. I will be attempting some high-speed photography this weekend to see if I can spot what is going on between papers that should not be all that different.
In this test I used paper from the same manufacturer at the same size and weight. The two types of paper were:
Paper #1
Michaels Recollections Cardstock Paper
South Beach (Colors)
83916 2010 05
UPS Code: 00100 62440
12" x 12"
65lb / 176 g/m2
Paper #2
Michaels Recollections Cardstock Paper
White
83916 2010 06
UPS Code: 00100 62450
12" x 12"
65lb / 176 g/m2
The test shape that I was trying to cut was from the Fundamentals #1 SD Card. Tree #1 in the Nature category. Since we wanted to push the eCraft, we were attempting to cut it at 3", the smallest size for this particular shape.
Tab Settings
Tab Density = 2
Tab Width = 1
Results
I did not have a single failure with the South Beach (colors) papers. Here is the demonstration of that success: First the cut pieces.

Now, the paper from which they were cut...

As you can see, I was able to repeat the success consecutively at all positions along the page. But, I was NOT able to achieve that same success with the White version of that very same paper series. This was the typical result using the white paper when I tried the very same exercise with the same settings above.

Not very pretty, is it? In fact I was only able to cut one tree with this particular paper. Here is that tree and the other shapes that I WAS able to successfully cut. I put a piece of pink paper behind them so that you could see them more clearly.

Notice that I that the small heart is just 1/2" and it's just as clean as the 5" heart. Both of the other cuts are 3" and seem OK. But, the tree was NOT typical of the outcome with all my other attempts. Once I'd tried the initial settings, I tried other setting with as little success as the first... except for this one lone tree.
What this tells me is that there might be a grain or texture issue with the white that is not a factor once the paper is colored. This would explain why the hearts that put little pressure against the paper's grain turned out perfectly fine. And, even the swirling shape doesn't put all that much pressure on the grain. But, the tight turns in the branches of the tree DO put a lot of pressure on the grain of the paper. I can actually see the paper being slightly lifted. So, I'm trying to come up with a solution.
Now, I can't imagine that I would be cutting and THEN applying glue. So, this issue may go away by simply using the Xyron to put an adhesive backing on the white paper as we probably would do in our primary applications/ But, not everyone is going to be doing that. So, we have to do what we can to solve this issue.
And, I find the fact that papers with the same nominal specifications can behave so differently. I KNOW it's some difference in the papers. But, papers aren't going to be blamed by most eCraft owners. The eCraft is the one that is going to be blamed and it's Craftwell and those of us that love experimenting that will have to come up with a solution so that the eCraft will NOT be blamed.
But, I am learning this. Different papers and materials do have a critical bearing on the success or failure of intricate cuts with the eCraft. It's hard to know exactly why. But, I'm determined to find out. I will be attempting some high-speed photography this weekend to see if I can spot what is going on between papers that should not be all that different.
In this test I used paper from the same manufacturer at the same size and weight. The two types of paper were:
Paper #1
Michaels Recollections Cardstock Paper
South Beach (Colors)
83916 2010 05
UPS Code: 00100 62440
12" x 12"
65lb / 176 g/m2
Paper #2
Michaels Recollections Cardstock Paper
White
83916 2010 06
UPS Code: 00100 62450
12" x 12"
65lb / 176 g/m2
The test shape that I was trying to cut was from the Fundamentals #1 SD Card. Tree #1 in the Nature category. Since we wanted to push the eCraft, we were attempting to cut it at 3", the smallest size for this particular shape.
Tab Settings
Tab Density = 2
Tab Width = 1
Results
I did not have a single failure with the South Beach (colors) papers. Here is the demonstration of that success: First the cut pieces.

Click image to see larger version
Now, the paper from which they were cut...

Click image to see larger version
As you can see, I was able to repeat the success consecutively at all positions along the page. But, I was NOT able to achieve that same success with the White version of that very same paper series. This was the typical result using the white paper when I tried the very same exercise with the same settings above.

Click image to see larger version
Not very pretty, is it? In fact I was only able to cut one tree with this particular paper. Here is that tree and the other shapes that I WAS able to successfully cut. I put a piece of pink paper behind them so that you could see them more clearly.

Click image to see larger version
Notice that I that the small heart is just 1/2" and it's just as clean as the 5" heart. Both of the other cuts are 3" and seem OK. But, the tree was NOT typical of the outcome with all my other attempts. Once I'd tried the initial settings, I tried other setting with as little success as the first... except for this one lone tree.
What this tells me is that there might be a grain or texture issue with the white that is not a factor once the paper is colored. This would explain why the hearts that put little pressure against the paper's grain turned out perfectly fine. And, even the swirling shape doesn't put all that much pressure on the grain. But, the tight turns in the branches of the tree DO put a lot of pressure on the grain of the paper. I can actually see the paper being slightly lifted. So, I'm trying to come up with a solution.
Now, I can't imagine that I would be cutting and THEN applying glue. So, this issue may go away by simply using the Xyron to put an adhesive backing on the white paper as we probably would do in our primary applications/ But, not everyone is going to be doing that. So, we have to do what we can to solve this issue.
And, I find the fact that papers with the same nominal specifications can behave so differently. I KNOW it's some difference in the papers. But, papers aren't going to be blamed by most eCraft owners. The eCraft is the one that is going to be blamed and it's Craftwell and those of us that love experimenting that will have to come up with a solution so that the eCraft will NOT be blamed.
Tuesday, August 17, 2010
Craft Foam and Material Observations
I was very surprised when I saw the claim on the eCraft Facebook site that the Craftwell staff had been able to successfully cut Fun Foam. And, I wasn't convinced until they sent me a photo of some of the fun foam objects they had cut. This completely puzzled me since I had not had any success at all with the Fun Foam I'd tested.
Zilch! Nada! Zip!
In the course of the conversation as we tried to sort through how they were successful and I was not, the Craftwell person trying to help me get the right settings mentioned that they had been using adhesive backed Fun Foam. LIGHT BULB!!!!
I had NOT. Nor, did I have any adhesive backed foam to test at the time. But, I made a commitment to see if that was the missing ingredient on my end. I am determined to give the eCraft a thorough and fair test. And, I am determined, as much as possible, to walk out in front in terms of experimenting with my eCraft so that the readers of this blog will not have to reinvent the wheel.
Thanks to Aussie Gigi, of the eCraft_Crafters group on Yahoo, I was pointed to a New Jersey supplier of craft foam that actually had a vareity of thicknesses (.5mm, 1mm, 2m and 3mm). I ordered some and it should be here in a few days. In the mean time I have found some slightly thinner Craft Foam at Five and Below in several sizes. The first size is in 9" x 12" sheets. There are 10 sheets in a pack. It is produced by Nicole Crafts which appears to be connected to Ben Franklin stores.

The second size is 7" x 10" and appears to be distributed by Horizon Group, USA of Warren, New Jersey. They do not list a web address; but, their phone number is 800-651-0616.

And, this same importer sells Kids Crafts Foam Sheets in 5.5" x 8.5" in 16 sheet packages.

Now, Obviously the only reason for passing on this information is that I have, in fact, managed to cut Craft Foam (Fun Foam) successfully. I have. But, with a caveat. I have only been able to cut any of the brands when they had a backing attached. Here's a simple diagram that demonstrates why this is true. Foam is a very floppy material. It lacks enough stiffness on its own.
Cutting on digital die cutters is controlled in different ways along the X and Y axes. The 'X' axis is controlled by moving the head left and right with the material remaining stationary. The material being cut only moves in the "Y" axis by pulling and pushing the material past the cutting blade. When the material is being pulled, it lies flat and cuts cleanly. And, if a material is still enough it still lies flat as it is pushed the other way against the blade. But, Craft Foam, by itself, is too weak to remain flat as it is pushed against the blade. It can, therefore, bunch up, causing the cut to fail. Adding the adhesive backing stiffens the Fun Foam so that it remains flat as it's pushed against the blade. That's why my attempts failed and Craftwell's attempts succeeded.

Since I was determine NOT to fail, I needed to find a way to add stiffening to my new thinner craft foam. So, I went out today and bought a Xyron 900 Creative Station that would permit me to add an adhesive backing to any material. I think it is going to be an essential investment if I want to be able to cut some of the more delicate materials I hope to try.
As a control, I first tried one of the sheets of the new foam without adding a backing. No go.
The I ran a second piece of the foam through the Xyron and immediately placed the foam into the eCraft, selected a shape and gave it a try. IT WORKED!!!! It actually WORKED!!!! Here is the first piece cut.

There was a little roughness along the top right of the heart. But, all-in-all, the first cut, at Pressure 6 with 0 Tabs was pretty good! It had not cut all the way through the backing at a few points, so I decided to up the ante and go for a Pressure of 8 with 3 Passes.

Whoops! Wrong direction. It cut through on the first pass. So, the two extra passes just mess up the edges. Still, it DID cut. So, lets go for one more try using a Pressure of 8, Tabs 1/1 and a single pass. This time I used a more complex shape.

Now we are hitting on all cylinders. This was a VERY nice cut as far as I'm concerned. So, the Craftwell experience with Fun Foam has been duplicated. The trick is to make sure to support the Fun Foam with some backing and the Xyron 900 does a beautiful job.
Conclusion: The eCraft DOES cut adhesive backed Fun Foam.
ADDENDUM: Same technique with wispy material
Before I received my eCraft, I'd purchased some of the thinnest, wispy material that I could find in an art paper just to test on it. But, until I had the Xyron, I had no way of stiffening it enough to try. Here is my first cut using the marvelously delicate material. I have pasted it down to a pick sheet for contrast. Be sure to look at it at the largest size possible by clicking on the image twice. You can't really appreciate what the eCraft was able to do until you really understand the full nature of the material. It's VERY cool!

The dark line you can see in the left side of the 'U' came from my not being careful enough running it through the Xyron, creating a crease as it ran through the Xyron's press. It has nothing to do with the eCraft. I probably would choose to use 0 tabs for the next tests with this material.
Zilch! Nada! Zip!
In the course of the conversation as we tried to sort through how they were successful and I was not, the Craftwell person trying to help me get the right settings mentioned that they had been using adhesive backed Fun Foam. LIGHT BULB!!!!
I had NOT. Nor, did I have any adhesive backed foam to test at the time. But, I made a commitment to see if that was the missing ingredient on my end. I am determined to give the eCraft a thorough and fair test. And, I am determined, as much as possible, to walk out in front in terms of experimenting with my eCraft so that the readers of this blog will not have to reinvent the wheel.
Thanks to Aussie Gigi, of the eCraft_Crafters group on Yahoo, I was pointed to a New Jersey supplier of craft foam that actually had a vareity of thicknesses (.5mm, 1mm, 2m and 3mm). I ordered some and it should be here in a few days. In the mean time I have found some slightly thinner Craft Foam at Five and Below in several sizes. The first size is in 9" x 12" sheets. There are 10 sheets in a pack. It is produced by Nicole Crafts which appears to be connected to Ben Franklin stores.

The second size is 7" x 10" and appears to be distributed by Horizon Group, USA of Warren, New Jersey. They do not list a web address; but, their phone number is 800-651-0616.
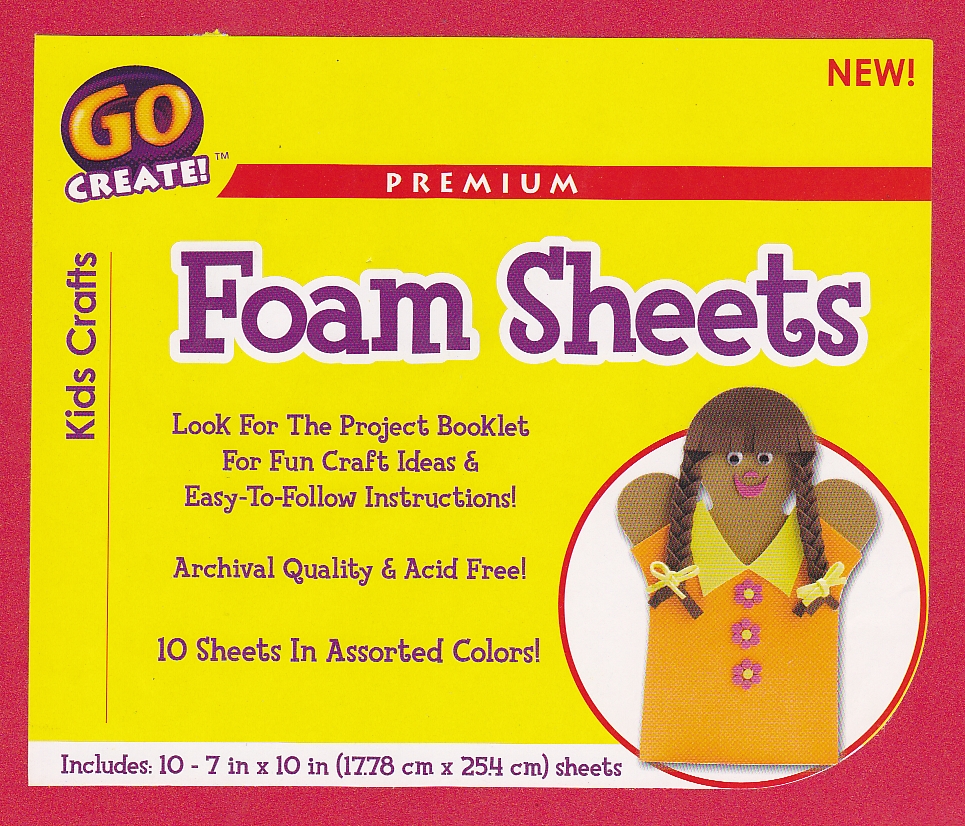
And, this same importer sells Kids Crafts Foam Sheets in 5.5" x 8.5" in 16 sheet packages.

Now, Obviously the only reason for passing on this information is that I have, in fact, managed to cut Craft Foam (Fun Foam) successfully. I have. But, with a caveat. I have only been able to cut any of the brands when they had a backing attached. Here's a simple diagram that demonstrates why this is true. Foam is a very floppy material. It lacks enough stiffness on its own.
Cutting on digital die cutters is controlled in different ways along the X and Y axes. The 'X' axis is controlled by moving the head left and right with the material remaining stationary. The material being cut only moves in the "Y" axis by pulling and pushing the material past the cutting blade. When the material is being pulled, it lies flat and cuts cleanly. And, if a material is still enough it still lies flat as it is pushed the other way against the blade. But, Craft Foam, by itself, is too weak to remain flat as it is pushed against the blade. It can, therefore, bunch up, causing the cut to fail. Adding the adhesive backing stiffens the Fun Foam so that it remains flat as it's pushed against the blade. That's why my attempts failed and Craftwell's attempts succeeded.

Since I was determine NOT to fail, I needed to find a way to add stiffening to my new thinner craft foam. So, I went out today and bought a Xyron 900 Creative Station that would permit me to add an adhesive backing to any material. I think it is going to be an essential investment if I want to be able to cut some of the more delicate materials I hope to try.
As a control, I first tried one of the sheets of the new foam without adding a backing. No go.
The I ran a second piece of the foam through the Xyron and immediately placed the foam into the eCraft, selected a shape and gave it a try. IT WORKED!!!! It actually WORKED!!!! Here is the first piece cut.

Click image for larger size
There was a little roughness along the top right of the heart. But, all-in-all, the first cut, at Pressure 6 with 0 Tabs was pretty good! It had not cut all the way through the backing at a few points, so I decided to up the ante and go for a Pressure of 8 with 3 Passes.

Click image for larger size
Whoops! Wrong direction. It cut through on the first pass. So, the two extra passes just mess up the edges. Still, it DID cut. So, lets go for one more try using a Pressure of 8, Tabs 1/1 and a single pass. This time I used a more complex shape.

Click image for larger size
Conclusion: The eCraft DOES cut adhesive backed Fun Foam.
ADDENDUM: Same technique with wispy material
Before I received my eCraft, I'd purchased some of the thinnest, wispy material that I could find in an art paper just to test on it. But, until I had the Xyron, I had no way of stiffening it enough to try. Here is my first cut using the marvelously delicate material. I have pasted it down to a pick sheet for contrast. Be sure to look at it at the largest size possible by clicking on the image twice. You can't really appreciate what the eCraft was able to do until you really understand the full nature of the material. It's VERY cool!

The dark line you can see in the left side of the 'U' came from my not being careful enough running it through the Xyron, creating a crease as it ran through the Xyron's press. It has nothing to do with the eCraft. I probably would choose to use 0 tabs for the next tests with this material.
eCraft Material Handling
You won't have had your eCraft very long, if you are adventurous, before you try to load something that is a bit thick for the eCraft to handle... about 1mm in depth.
And, when you do, for the first time, you will hear a frightening sound! Relax. You are NOT destroying your machine. You are rasping the edge of your media. Let's take a good look a the eCraft paper handling systems.
Materials can be loaded into the eCraft from the front or from the back using the tray or roller. Depending on which is selected, the material to be cut is going to first come into contact with two difference sets of rollers. Let's start with loading from the front.
If conventient, you might want to turn your eCraft over and open the bottom door that is meant to permit you to clean out your eCraft. It will give you your best view of both roller systems and help put your mind to rest about the noise you hear from time to time. Unscrew the red screw and lift the door. Sorry about the focus in this image of the bottom door. I'll be replacing it soon with one much sharper. But, it will at least provide you with an idea of what you will see.

As you see, the front set of rollers is to the right in this image and the rear set of rollers is to the left. The front rollers are the primary rollers for the machine. And, these are the rollers that are the source of the 'grinding' noise that one can hear when trying to load thick materials. I'll get to this later. But, let's start with the rear roller system.

The rear rollers are used to pull materials into the eCraft from the tray or rolls. There is a wide roller that goes the length of the machine and a smaller set of rollers that keep the eCraft from ingesting too many sheets of material. The latter is spring loaded and accommodates more depth than the primary rollers. These rollers counter-rotate using a gear assembly on one end of the eCraft.


And, when you do, for the first time, you will hear a frightening sound! Relax. You are NOT destroying your machine. You are rasping the edge of your media. Let's take a good look a the eCraft paper handling systems.
Materials can be loaded into the eCraft from the front or from the back using the tray or roller. Depending on which is selected, the material to be cut is going to first come into contact with two difference sets of rollers. Let's start with loading from the front.
If conventient, you might want to turn your eCraft over and open the bottom door that is meant to permit you to clean out your eCraft. It will give you your best view of both roller systems and help put your mind to rest about the noise you hear from time to time. Unscrew the red screw and lift the door. Sorry about the focus in this image of the bottom door. I'll be replacing it soon with one much sharper. But, it will at least provide you with an idea of what you will see.

Click Image for Full Size Version
As you see, the front set of rollers is to the right in this image and the rear set of rollers is to the left. The front rollers are the primary rollers for the machine. And, these are the rollers that are the source of the 'grinding' noise that one can hear when trying to load thick materials. I'll get to this later. But, let's start with the rear roller system.

Click Image for Full Size Version
The rear rollers are used to pull materials into the eCraft from the tray or rolls. There is a wide roller that goes the length of the machine and a smaller set of rollers that keep the eCraft from ingesting too many sheets of material. The latter is spring loaded and accommodates more depth than the primary rollers. These rollers counter-rotate using a gear assembly on one end of the eCraft.

Click Image for Full Size Version
The gears not only turn the rollers; but, have the effect of tightening the smaller rollers against any extra seets of paper that might have been drawn into the machine. I suspect that most materials loaded from the rear, even considerably thicker than the machine can really handle, will make it through the rear roller assembly.
The real limits in how thick a material can be and still be handled by the eCraft are defined by the front rollers. And, these rollers are remarkably clever in design. There are two rollers. One is covered with rubber and the other is wrapped with what can best be described as a rasp! To best see this, please click on the image below. By the way, I had been cutting some glitter material just before this image was taken, which explains the tiny flecks.

Click Image for Full Size Version
It is this rough surface that locks the material into place so securely that precision is maintained. But, for the adventurous user, it is also the surface that generates that horrifying sound (when you first hear it) that makes them think the machine is going to be torn apart. Not true. It's simply the rasp surface trying to get a grip around a too thick edge and... well... rasping it instead! You end up filing the material rather than loading the material.
Had I understood this when I first tried fun Foam I could have at least seen that because it is so pliable that eventually it would load. But, the noise stopped me in my tracks. Now that I know WHY this noise was made, I will be able to better decide if the material is hopelessly too thick or simply has a rougher time getting started. With Fun Foam it's just a matter of having a rougher time getting started. Once the rasp surface gets a good grip it's quiet once again.
There is only one other aspect of front loading that needs to be addressed. And that is the two small passive rollers on either side of the front of the machine. What is important about these rollers is that they are spring loaded. The rollers, themselves, will life up high enough to take something like Fun Foam. It is the HOUSING for the rollers that is inflexible. And, that housing has exactly 1mm clearance. So, while the primary front loading roller system CAN handle just over 1mm, the housings on either side make it tough to use these thicker materials in 12" widths. In fact, the limit is just under 11" wide for deeper materials... unless, of course, you don't mind voiding your warranty and filing the edges of the housing to provide deeper clearance. (I DO have a devious mind, don't I? I think it comes from having all these jeweler's tools around here!)


Click Image for Full Size Version
To me, the paper handling of the eCraft is a beautiful and ingenious design. It leads me to believe that we will be able to achieve very high precision with almost any material that will load into the machine. I like the way the eCraft designers think.
Nice going eCraft engineering team! Great job!
Monday, August 16, 2010
I LOVE being proved wrong... er...sometimes.
And this is one of those times.
As you know, I have had no luck at all with Fun Foam. And, because my 67 year old body houses a 7 year old's personality, Fun Foam is one of my FAVORITE materials. It pained me to have to give up on being able to use it in my eCraft.
So, when I saw on eCraft's Facebook page a post from them saying they had actually tested it and obtained a clean cut, I was actually kind of disturbed. (Hmmm.... I hope none of my relatives read THAT one!) But, I digress.... back to the topic at hand. My relative's diagnoses will just have to wait.
The reason why I was disturbed was because I had put a lot of effort into trying to get a clean cut in Fun Foam and had not been able to do so. And, I believed that if my experience was typical, users were going to be misled by Craftwell's claim that it could be done. So, I decided to make a video showing what I was seeing as I tried to cut Fun Foam and fire it off to Craftwell. It was NOT a pretty video.
The email I got back was not an angry or even a defensive reply. It was a genuinely puzzled attempt to understand how our two experiences were so totally different along with a promise to work with me to try to solve the problems. They are even going to go out and search for the brand of Fun Foam I'd been trying to cut to see if that might account for the differences.
But, most importantly they showed me PROOF in the form of images that included a closeup of the edges they were able to achieve. Normally finding out that one is wrong is a reason to mope. But, not in this case. It is the best news I could have possibly gotten with regards to my experience with Fun Foam. What it means is that like Edison, I know a lot of settings that DON'T work with my machine in trying to cut Fun Foam. But, unlike Edison, I now have the advantage of seeing that someone DID find the right settings and the right brand of material. I now KNOW it can be done.
So, I am back on the case to try to repeat what they have accomplished. It will take a bit of time because I need to get some new blades in first. It is completely unfair to do with test without being able to use new blades and I've been very hard on my blades with things like chip board and plywood. I want this to work. And, I want this to be a completely fair test.
For one thing, they had used adhesive back foam. I had not. Yet, adhesive backed is exactly the kind of Fun Foam I was most interested in. I'd avoided it because that bit of adhesive backing makes the Fun Foam a little thicker and I had made the mistake of assuming that it would be LESS likely to work, not more.
I am here to test for YOU. But, I am not here to mislead you by missing something important. So, I am VERY glad that Craftwell replied as they did with HELP and PROOF that it CAN BE DONE. I'm very excited to be able to pick up the chase for Fun Foam one more time! So, as soon as I can replenish my new blade supply we'll give it another try. Nice going Craftwell.
As you know, I have had no luck at all with Fun Foam. And, because my 67 year old body houses a 7 year old's personality, Fun Foam is one of my FAVORITE materials. It pained me to have to give up on being able to use it in my eCraft.
So, when I saw on eCraft's Facebook page a post from them saying they had actually tested it and obtained a clean cut, I was actually kind of disturbed. (Hmmm.... I hope none of my relatives read THAT one!) But, I digress.... back to the topic at hand. My relative's diagnoses will just have to wait.
The reason why I was disturbed was because I had put a lot of effort into trying to get a clean cut in Fun Foam and had not been able to do so. And, I believed that if my experience was typical, users were going to be misled by Craftwell's claim that it could be done. So, I decided to make a video showing what I was seeing as I tried to cut Fun Foam and fire it off to Craftwell. It was NOT a pretty video.
The email I got back was not an angry or even a defensive reply. It was a genuinely puzzled attempt to understand how our two experiences were so totally different along with a promise to work with me to try to solve the problems. They are even going to go out and search for the brand of Fun Foam I'd been trying to cut to see if that might account for the differences.
But, most importantly they showed me PROOF in the form of images that included a closeup of the edges they were able to achieve. Normally finding out that one is wrong is a reason to mope. But, not in this case. It is the best news I could have possibly gotten with regards to my experience with Fun Foam. What it means is that like Edison, I know a lot of settings that DON'T work with my machine in trying to cut Fun Foam. But, unlike Edison, I now have the advantage of seeing that someone DID find the right settings and the right brand of material. I now KNOW it can be done.
So, I am back on the case to try to repeat what they have accomplished. It will take a bit of time because I need to get some new blades in first. It is completely unfair to do with test without being able to use new blades and I've been very hard on my blades with things like chip board and plywood. I want this to work. And, I want this to be a completely fair test.
For one thing, they had used adhesive back foam. I had not. Yet, adhesive backed is exactly the kind of Fun Foam I was most interested in. I'd avoided it because that bit of adhesive backing makes the Fun Foam a little thicker and I had made the mistake of assuming that it would be LESS likely to work, not more.
I am here to test for YOU. But, I am not here to mislead you by missing something important. So, I am VERY glad that Craftwell replied as they did with HELP and PROOF that it CAN BE DONE. I'm very excited to be able to pick up the chase for Fun Foam one more time! So, as soon as I can replenish my new blade supply we'll give it another try. Nice going Craftwell.
This is OUR blog!
I try, in my reply to those that post comments to let each and every one of you know how important your contributions are not only to the success of your fellow die cutter users; but, to how successfully this blog supports them. I got a great reminder of that just a minute ago when I read this comment.
You remember that "THING" that I held up in my first video and set aside? I'd COMPLETELY forgotten about having found out what it was!!! It's called a Paper Support Insert. And, it fits in the back tray. And, I suspect that you ARE putting it in correctly. But, it is possible to put it in 180 degrees off. Here's an image of it in place. I was too lazy to remove my macro lens, so not all of it will be in focus. But, you'll still get the picture. The important thing is that the square hole in the paper support should fit over the square hole in the tray and the wide end goes into the machine.

I have tested the tray loading with the only 12" x 12" cardstock that I have, which was DCWV Textured White Core Cardstock. I loaded 3 sheets into the tray, selected TRAY MODE and it worked very well.
But, Wolfmax, I KNOW the disconcerting noises that you are talking about. It is the sound that the loading mechanism makes when trying to pull in materials that are just a tad too thick. So, I don't think the problem is the paper support itself. It's more likely the thickness of the card stock. How well does the card stock load through the font of the machine? Does it still make that downright frightening noise? If not, then my guess about the thickness is suspect.
But, let's keep chasing down the reason for the behavior you are describing. I'm in the USA. So, our paper sizes and thickness might differ from yours. I'm hoping that someone else might check tray loading on their own machine with 240g cardstock. You've asked a great question and I am so glad that you did so. Now, all we have to do is wait for someone in our growing community to come to BOTH our rescues. Thanks, Wolfmax! And, tell your girlfriend she made a good choice in both the gift and the giver! :)
wolfmax said... Hi
Great blog. Just the sort of info My girlfriend and I needed.
Having just bought one of these for my girlfriend we have come across an issue that i have not found any info about on the web so i was wondering if you had an insight. The issue is the perspex tray insert with the ruler markings on. The instructions say it is a 'Paper Support Insert' and it sits in the tray. But when we tested a piece of 12" x 12" 240g card with the insert in the tray, the card failed to be drawn in properly and the machine made some rather disconcerting noises. Without the insert, the same card worked flawlessly but we did find we couldn't put more than one piece in at a time as the machine pulled more than one through (well at least both the sheets we had in the tray at the same time). So, any idea on what and/or how this insert is to be used?
Thanks in advance.
You remember that "THING" that I held up in my first video and set aside? I'd COMPLETELY forgotten about having found out what it was!!! It's called a Paper Support Insert. And, it fits in the back tray. And, I suspect that you ARE putting it in correctly. But, it is possible to put it in 180 degrees off. Here's an image of it in place. I was too lazy to remove my macro lens, so not all of it will be in focus. But, you'll still get the picture. The important thing is that the square hole in the paper support should fit over the square hole in the tray and the wide end goes into the machine.

Click image to enlarge
I have tested the tray loading with the only 12" x 12" cardstock that I have, which was DCWV Textured White Core Cardstock. I loaded 3 sheets into the tray, selected TRAY MODE and it worked very well.
But, Wolfmax, I KNOW the disconcerting noises that you are talking about. It is the sound that the loading mechanism makes when trying to pull in materials that are just a tad too thick. So, I don't think the problem is the paper support itself. It's more likely the thickness of the card stock. How well does the card stock load through the font of the machine? Does it still make that downright frightening noise? If not, then my guess about the thickness is suspect.
But, let's keep chasing down the reason for the behavior you are describing. I'm in the USA. So, our paper sizes and thickness might differ from yours. I'm hoping that someone else might check tray loading on their own machine with 240g cardstock. You've asked a great question and I am so glad that you did so. Now, all we have to do is wait for someone in our growing community to come to BOTH our rescues. Thanks, Wolfmax! And, tell your girlfriend she made a good choice in both the gift and the giver! :)
Five Days of Impressions
Five days isn't a very long time. It's an especially short time when you can't put full days into evaluating a product. But, it's certainly enough time for either buyer's remorse or confirmation that one's decision was a good one.
I have a Gazelle, it's the only other digital die cutting machine I have ever used. And, it's a good one. In fact, among those digital die cutters that use a cutting mat, it is one of the best ones.
I have two daughters. I would like to give each of my daughters a digital die cutting machine and keep one for myself. That means needing a minimum of three machines. And, as I've mentioned earlier, I have already ordered 2 eCraft machines. So, the question is this. Should I simply give one of the daughters the Gazelle? Or, is the eCraft impressive enough to go ahead and make sure that each of us owns one.
Now, remember, I've never tried the software with the eCraft. And, my final decision will certainly have to wait until I've had a chance to see how easy it is to use eCraftShop Pro. And, I should also say that one daughter is a Mac user. To purchase a third eCraft also means giving that daughter a PC with which to use it. Even so, my inclination after just 5 days of having an eCraft is that whereas the Gazelle would sit for much of the time, the eCraft would be used for much of the time. And, that means I am planning to purchase a third eCraft while the introductory price is still available to us.
Obviously, this means that I have no buyer's remorse at all about my initial eCraft purchase. None whatsoever!
Yes, there are some actions when using the control panel that could be smoother and more intuitive. As soon as I have a voice back, I'll create a video that demonstrates some of these. And, yes, there are still some questions as to the absolute precision for more advanced applications requiring repetition. But, from the standpoint of simply sitting down, selecting a shape, putting in a piece of paper and creating a cut... as I expect my granddaughters will want to do... there is no cutter out there that is better for them, if for no other reason than one does not need to mess with a mat. And, should my granddaughters have a friend over for a visit, they can step them through the process by simply pointing out the Quick Start directions right on the inside of the cover.

There is something about the eCraft that just makes it comfortable and non-intimidating to use. It invites you to use it.
And, if there is one thing that I would like to impress upon you about my own initial impressions is that very thing. It invites me to use it. It invites me to think of new ways I might use it. It invites me to thnk of new materials I can use with it. It is an inviting machine. And, it is an inviting machine because of the thoughtfulness of the designers. They weren't just designing a machine that cuts. They were designing a machine for US... the humans that need a machine that cuts.
The tests that I have done and have planned might be able to communicate tangible hard facts. But, they will not be so great at communicating the intangible ways the eCraft's designers just make you feel comfortable with it. Sooner or later, I expect the eCraft to recieve an award simply for the case design itself. That's part of it's inviting appeal. And, then, there is the way the cutting/printing trolley is so accessible and the comforting blue light is so visible.

The thoughtfulness of the numbered and lighted pressure dial contributes to my appreciation for it. But, perhaps, the thing that makes it say, "I'm here for you." more than anything else is the abundance of step-by-step directions printed right on the machine itself.
The Basic Operations on the inside of the top cover....

The clear Blade Replacement directions just above the trolley...


And, even the Pen replacement directions.

In five days there is no way to know how well the eCraft will hold up. There is no way to know if it will easily do everything we will want to do with it. And, in fact, it is already apparent that it will NOT do all I'd hoped it would do, like handle Fun Foam and give me perfectly aligned cuts across pages time after time. But, I would rather have an inviting machine than a perfect machine with a design that stands in the way of using it.
And, I will say it one more time. The eCraft is an INVITING machine.
I have a Gazelle, it's the only other digital die cutting machine I have ever used. And, it's a good one. In fact, among those digital die cutters that use a cutting mat, it is one of the best ones.
I have two daughters. I would like to give each of my daughters a digital die cutting machine and keep one for myself. That means needing a minimum of three machines. And, as I've mentioned earlier, I have already ordered 2 eCraft machines. So, the question is this. Should I simply give one of the daughters the Gazelle? Or, is the eCraft impressive enough to go ahead and make sure that each of us owns one.
Now, remember, I've never tried the software with the eCraft. And, my final decision will certainly have to wait until I've had a chance to see how easy it is to use eCraftShop Pro. And, I should also say that one daughter is a Mac user. To purchase a third eCraft also means giving that daughter a PC with which to use it. Even so, my inclination after just 5 days of having an eCraft is that whereas the Gazelle would sit for much of the time, the eCraft would be used for much of the time. And, that means I am planning to purchase a third eCraft while the introductory price is still available to us.
Obviously, this means that I have no buyer's remorse at all about my initial eCraft purchase. None whatsoever!
Yes, there are some actions when using the control panel that could be smoother and more intuitive. As soon as I have a voice back, I'll create a video that demonstrates some of these. And, yes, there are still some questions as to the absolute precision for more advanced applications requiring repetition. But, from the standpoint of simply sitting down, selecting a shape, putting in a piece of paper and creating a cut... as I expect my granddaughters will want to do... there is no cutter out there that is better for them, if for no other reason than one does not need to mess with a mat. And, should my granddaughters have a friend over for a visit, they can step them through the process by simply pointing out the Quick Start directions right on the inside of the cover.

Click on Image for full size
There is something about the eCraft that just makes it comfortable and non-intimidating to use. It invites you to use it.
And, if there is one thing that I would like to impress upon you about my own initial impressions is that very thing. It invites me to use it. It invites me to think of new ways I might use it. It invites me to thnk of new materials I can use with it. It is an inviting machine. And, it is an inviting machine because of the thoughtfulness of the designers. They weren't just designing a machine that cuts. They were designing a machine for US... the humans that need a machine that cuts.
The tests that I have done and have planned might be able to communicate tangible hard facts. But, they will not be so great at communicating the intangible ways the eCraft's designers just make you feel comfortable with it. Sooner or later, I expect the eCraft to recieve an award simply for the case design itself. That's part of it's inviting appeal. And, then, there is the way the cutting/printing trolley is so accessible and the comforting blue light is so visible.

Click on Image for full size
The thoughtfulness of the numbered and lighted pressure dial contributes to my appreciation for it. But, perhaps, the thing that makes it say, "I'm here for you." more than anything else is the abundance of step-by-step directions printed right on the machine itself.
The Basic Operations on the inside of the top cover....

Click on Image for full size
The clear Blade Replacement directions just above the trolley...

Click on Images for full size

And, even the Pen replacement directions.

Click on Image for full size
In five days there is no way to know how well the eCraft will hold up. There is no way to know if it will easily do everything we will want to do with it. And, in fact, it is already apparent that it will NOT do all I'd hoped it would do, like handle Fun Foam and give me perfectly aligned cuts across pages time after time. But, I would rather have an inviting machine than a perfect machine with a design that stands in the way of using it.
And, I will say it one more time. The eCraft is an INVITING machine.
Sunday, August 15, 2010
Getting Around to the Tray Mode
The most significant quandary that I face as one of the first people to be testing the eCraft is the very lack of experience that also makes me useful. The reason WHY it is a quandary is that I could inadvertently say something that might wrongly influence someone NOT to buy an eCraft simply because I am trying things that a person with experience would never try.
And, that is why I want you to be very careful in how much significance you place on my quick analysis of the Tray Mode.
First, the tray mode appears to me to need the eCraftShop Pro software in order to behave as we might expect it to behave, like a printer repeatedly printing pages from a tray. In my limited experience, it does NOT function this way simply from the control panel and LCD display. One has to start a new cut or repeat a cut by pressing the "CUT" button in order to pull in a new sheet into the printer. So, you can't really just say I want to set up these cuts on a single sheet and repeat it 15 times on 15 new sheets.
Moreover, you can't really design a PAGE from the LCD. The machine will allow you to select multiple objects to cut and then it picks out the arrangement. If the selected objects number more than would fit, it appears to ignore those objects that will not fit.
So, we can already see that it really isn't proper to test the machine's tray mode with only the LCD Control Panel to drive it. But, we did it anyway. So, how did it do?

I find the best way to test and show repeatability is to use different colored paper and scan the overlaid pages from which the cuts were made. I tape the edges of the papers together so that they do not slide apart in the scanner. As you can see, the first object seems very well calibrated. But, it's apparent that there was some slippage when it came to the second object. It's not enormous. But, still the cuts are not precisely overlaid as all of us might like. (Click on the image to see a larger version.)
Can any cutter do this? In my lack of experience with other cutters, I really don't know. In fact, I don't know any other cutter than even HAS a TRAY. So, maybe we are asking the eCraft to do something we've not been able to do with any cutter. After all, I used very heavy textured cardstock. Will other papers behave differently? Perhaps.
And, there is one more factor that leads me to ask for caution as you read about my observations. We don't know, yet, how the tray works when driven by the software. First, we will be able to create our own page layouts. We will be in control. Secondly, the page feeding should become automatic, just as we expect from any printer, where we can tell the eCraft we want 15 copies of our layout.
And, finally, only time and a lot of users will be able to iron out the optimal papers for the different modes if we want perfect repeatability and precision. I know, for instance, that when I put a full 2'x4' sheet of plywood into the machine that the weight of the plywood hanging over the front had a least a little effect on precision. Cutting the plywood down into 2' x 2' squares greatly improved performance. So, i have to believe that various types and weights of papers might make significant differences. Unfortunately, due to my cold at the moment, I don't have the luxury of finding other papers and weights.
So, please, use this information judiciously and don't jump to any false conclusions. Yes, we CAN see differences from page to page. And, NO I do NOT like to see that! But, at this point I'm just accepting it as a fact; but, not a final conclusion.
And, that is why I want you to be very careful in how much significance you place on my quick analysis of the Tray Mode.
First, the tray mode appears to me to need the eCraftShop Pro software in order to behave as we might expect it to behave, like a printer repeatedly printing pages from a tray. In my limited experience, it does NOT function this way simply from the control panel and LCD display. One has to start a new cut or repeat a cut by pressing the "CUT" button in order to pull in a new sheet into the printer. So, you can't really just say I want to set up these cuts on a single sheet and repeat it 15 times on 15 new sheets.
Moreover, you can't really design a PAGE from the LCD. The machine will allow you to select multiple objects to cut and then it picks out the arrangement. If the selected objects number more than would fit, it appears to ignore those objects that will not fit.
So, we can already see that it really isn't proper to test the machine's tray mode with only the LCD Control Panel to drive it. But, we did it anyway. So, how did it do?

I find the best way to test and show repeatability is to use different colored paper and scan the overlaid pages from which the cuts were made. I tape the edges of the papers together so that they do not slide apart in the scanner. As you can see, the first object seems very well calibrated. But, it's apparent that there was some slippage when it came to the second object. It's not enormous. But, still the cuts are not precisely overlaid as all of us might like. (Click on the image to see a larger version.)
Can any cutter do this? In my lack of experience with other cutters, I really don't know. In fact, I don't know any other cutter than even HAS a TRAY. So, maybe we are asking the eCraft to do something we've not been able to do with any cutter. After all, I used very heavy textured cardstock. Will other papers behave differently? Perhaps.
And, there is one more factor that leads me to ask for caution as you read about my observations. We don't know, yet, how the tray works when driven by the software. First, we will be able to create our own page layouts. We will be in control. Secondly, the page feeding should become automatic, just as we expect from any printer, where we can tell the eCraft we want 15 copies of our layout.
And, finally, only time and a lot of users will be able to iron out the optimal papers for the different modes if we want perfect repeatability and precision. I know, for instance, that when I put a full 2'x4' sheet of plywood into the machine that the weight of the plywood hanging over the front had a least a little effect on precision. Cutting the plywood down into 2' x 2' squares greatly improved performance. So, i have to believe that various types and weights of papers might make significant differences. Unfortunately, due to my cold at the moment, I don't have the luxury of finding other papers and weights.
So, please, use this information judiciously and don't jump to any false conclusions. Yes, we CAN see differences from page to page. And, NO I do NOT like to see that! But, at this point I'm just accepting it as a fact; but, not a final conclusion.
eCraft Test - Model Grade Birch Plywood
I'm very interested in the idea of expanding the use of digital die cutting machines into markets beyond scrapbooking. The more sales digital die makers can make, the lower the costs to everyone and the greater the encouragement for innovation.
One of those potential new areas is model airplanes and model railroading. So, I decided to test some of the materials common in both. Balsa wood, the most common material turns out to have a grain that is to easily shattered. It's not that the eCraft cannot cut it. But, as yet, I have not found the right setting before running out of test material. I think I was using too much pressure.
But, I did have a large sheet of Midwest Products Birch Plywood 1/64th of an inch thick. So, I decided to try it.
And, I am glad that I did. It cuts beautifully. Here is a sample cut. One tip is missing because I had set up the head too close to the edge and the blade ran off the edge on that side. You'll also notice that one of the cuts of the multicut setting of 5 seems to be offset ever so slightly.

I want to make sure to follow up on the slight offset issue. While the other side of this plywood, the side that is actually the 'Up' side, does NOT show the offset, it is something of which we need to be aware. Had I cut this face up, then the face would have been marred.
SPECIAL NOTE: THIS CUT FOLLOWED CHIP BOARD ATTEMPT
Just before trying the plywood cut, I once again tried chipboard. The blade never even scratched the surface. I couldn't even see where the blade had crossed over the surface. It was this failure that led me to try to see if it was the blade by trying the plywood. It was NOT the blade, as you can see from the above image that the eCraft was able to cut the plywood quite easily.
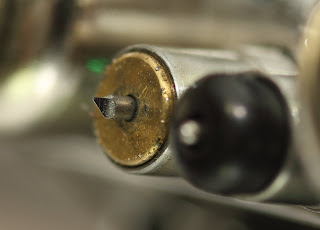 As you can see, even after making numerous cardboard cuts, several attempts at cutting chipboard and cutting the plywood quite easily, the blade is still in reasonably good sharpness. The tip is finally beginning to show the merest signs of flattening. But, not as much as I expected after the chipboard failures. This is good news because I ran the blade across the chipboard at the highest pressure setting for using at least 5 multi-cuts per attempt and 8 multi-cuts. So, it looks like the blades hold up quite well.
If someone is able to find the magic settings for cutting chipboard, please let us know.
One of those potential new areas is model airplanes and model railroading. So, I decided to test some of the materials common in both. Balsa wood, the most common material turns out to have a grain that is to easily shattered. It's not that the eCraft cannot cut it. But, as yet, I have not found the right setting before running out of test material. I think I was using too much pressure.
But, I did have a large sheet of Midwest Products Birch Plywood 1/64th of an inch thick. So, I decided to try it.
And, I am glad that I did. It cuts beautifully. Here is a sample cut. One tip is missing because I had set up the head too close to the edge and the blade ran off the edge on that side. You'll also notice that one of the cuts of the multicut setting of 5 seems to be offset ever so slightly.

I want to make sure to follow up on the slight offset issue. While the other side of this plywood, the side that is actually the 'Up' side, does NOT show the offset, it is something of which we need to be aware. Had I cut this face up, then the face would have been marred.
SPECIAL NOTE: THIS CUT FOLLOWED CHIP BOARD ATTEMPT
Just before trying the plywood cut, I once again tried chipboard. The blade never even scratched the surface. I couldn't even see where the blade had crossed over the surface. It was this failure that led me to try to see if it was the blade by trying the plywood. It was NOT the blade, as you can see from the above image that the eCraft was able to cut the plywood quite easily.

If someone is able to find the magic settings for cutting chipboard, please let us know.
Subscribe to:
Posts (Atom)